Bathroom Vent Through Wall: Complete DIY Installation Guide
You've just stepped out of the shower on a humid East Texas morning.
October 12, 2026 · 10 min read
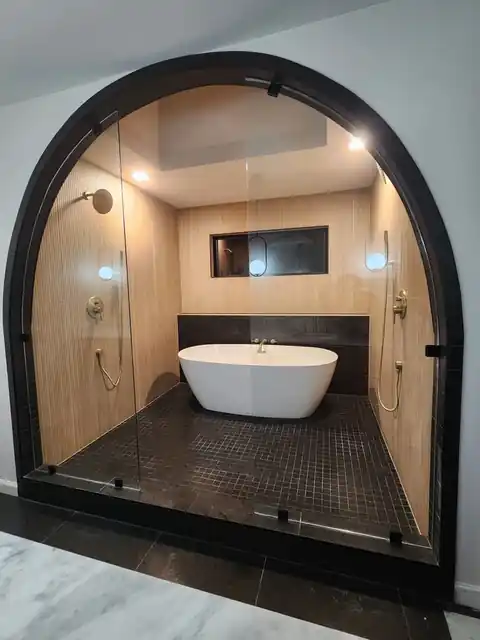
You've just stepped out of the shower on a humid East Texas morning. The mirror is clouded, the ceiling feels damp, and the bathroom fan is humming away without making much difference. Maybe the fan vents into the attic, the duct is crushed behind the wall, or the exterior flap barely opens. A bathroom vent through wall installation only works when the entire route, from grille to outdoor termination, moves enough air to remove moisture.
The reliable approach is straightforward: choose an appropriate fan, keep the duct short and smooth, discharge directly outdoors, seal the wall penetration, and verify delivered airflow after installation. Cutting an opening is only one part of the job. The measure of success is whether the system controls humidity without creating a new moisture problem inside the wall.
Why Proper Bathroom Ventilation Matters More Than You Think
On a humid East Texas morning, a bathroom can stay wet long after the shower ends. Warm air carries water vapor to cooler mirrors, painted drywall, trim, and exterior wall surfaces. Once a surface falls below the air's dew point, vapor becomes liquid water. Repeated condensation can soften finishes, support mold growth, and keep framing and insulation damp.
A bathroom exhaust fan must control moisture, not merely remove odors. The EPA guidance on biological contaminants and indoor air quality recommends indoor relative humidity below 60%, with an ideal range of 30% to 50%, and advises using a fan that vents outdoors during and after bathing. In a humid climate, that outdoor discharge and the fan's actual delivered airflow matter more than the rating printed on the housing.
Practical rule: Exhausting humid air into an attic, crawlspace, or wall cavity relocates the moisture instead of removing it.
What the airflow benchmark tells you
ANSI/ASHRAE Standard 62.2 gives a residential bathroom exhaust benchmark of 50 cfm intermittently or 20 cfm continuously, as documented in the ASHRAE Standard 62.2 addendum. For bathrooms under 100 square feet, the guidance also cites approximately 1 cfm per square foot. Larger rooms may call for 50 cfm for each shower, bathtub, and toilet, plus 100 cfm for each jetted tub.
These figures are design starting points, not proof that an installed system performs properly. A long duct, tight bend, crushed section, restrictive wall cap, or stuck exterior damper can reduce airflow substantially. Commissioning means checking that air leaves the room and reaches outdoors, then correcting restrictions rather than relying on fan noise.
The wall cap should discharge into open outdoor air, stay clear of obstructions, and remain separated from air intakes. Building America guidance advises at least 10 feet from mechanical air inlets or at least 3 feet from gravity air inlets. For related plumbing requirements, this plumbing vent size code guide is useful, but plumbing vents and bathroom exhaust ducts serve different systems.
Choosing the Right Duct Material for Your Wall Vent
Duct material affects resistance, condensation behavior, installation quality, and long-term durability. For a short, direct bathroom vent through wall route, smooth rigid metal duct is usually the strongest choice. Its interior surface stays open and smooth, so air encounters less turbulence than it does in a compressed or sagging flexible duct.
The Department of Energy recommends hard ducting of at least 28-gauge where hard-ducted installations apply, with short runs and few turns. Rigid metal also holds its shape through framing cavities and makes it easier to maintain a slight outward slope. Its disadvantages are practical: cutting and joining metal takes more care, and rigid sections don't tolerate an inaccurately planned route.
Where flexible duct earns its place
Foil flexible duct is easier to route around framing and small obstructions. That convenience comes with a penalty when installers leave it loose, compress it, or allow it to sag. Every sharp bend narrows the effective passage, while a low spot can collect condensate. Long unsupported flex can become a moisture reservoir and may deliver far less airflow than the fan label suggests.
Insulated flexible duct can help when the route crosses an unconditioned space or a wall transition where warm, moist exhaust could condense against a cold duct surface. It adds bulk and installation complexity, so it isn't automatically necessary for every short wall penetration. The right choice depends on the wall assembly, climate exposure, and whether the duct passes through conditioned or unconditioned space.
Never reduce the duct below the fan outlet. The installed duct should be at least as large as that outlet, and the wall cap must match the route. A reducer may seem like a convenient way to fit a smaller cap, but it increases resistance at exactly the point where the fan is already working against bends, dampers, and exterior wind.
Planning the Vent Path and Wall Opening
The best route is normally the shortest practical path directly through the exterior wall. Before cutting, identify the fan outlet direction, inspect the wall from both sides, and account for studs, plumbing, electrical wiring, insulation, siding, brick, or other cladding. A stud finder helps, but it won't reliably identify every pipe or cable, so inspect accessible areas and shut off power to nearby circuits before opening the wall.
Measure the fan outlet and wall cap together. Don't assume the nominal duct size matches the actual collar or cap opening. Mark the exterior termination where you can reach it for cleaning and damper inspection, while keeping it away from landscaping, decks, openings, and locations where wind-driven rain will collect.
Transfer the layout before making the cut
Use the duct or cap template only after confirming its dimensions. The Department of Energy guidance recommends making the wall opening no more than 1/2 inch larger than the duct, which limits the amount of sealing material needed and reduces air leakage. Drill a small pilot hole first if you need to verify the cavity and exterior location, then transfer the center point through the wall.
A planned bathroom remodel should coordinate ventilation with lighting, tile, framing, and plumbing rather than treating the fan as a last-minute penetration. The bathroom remodel planning guide can help organize those dependencies before finishes cover the route.
Keep horizontal ductwork slightly sloped toward the exterior. That slope gives condensation a path out instead of allowing water to run back toward the fan or settle inside the wall. If the route requires several elbows, crosses a difficult assembly, or involves structural modifications, review the project with a qualified professional. This guide on when to call an HVAC pro provides useful context for deciding when the work has moved beyond a simple replacement.
Cutting the Wall and Installing the Vent Cap
Once the route is confirmed, protect the bathroom and make controlled cuts. Remove only the drywall needed for the duct connection, then cut the exterior cladding with a tool suited to the material. For siding, preserve the weather-resistive layer and avoid crushing the surrounding panels. For masonry or stucco, the opening may require specialized tools and a different flashing method.
Feed the duct through without forcing it. Rigid metal is preferable for a short, straight run because it resists compression and makes the outward slope easier to maintain. Flexible duct is acceptable when the wall cavity demands it, but stretch it fully, support it at intervals, and keep it free of tight bends. The Department of Energy recommends insulating duct sections that pass through unconditioned space, with R-8 insulation where required by the authority having jurisdiction. Details are available in the DOE hard-ducted ventilation job aid.
Match the sealing method to the assembly
Use approved foil tape or mastic on every duct joint. Standard cloth-backed duct tape can dry out and release as temperatures and humidity change. Secure the duct so fasteners don't collapse the passage, and seal the connection at the fan collar as carefully as the exterior joint.
The wall cap is the weather barrier, not a decorative cover. Fit it tightly, integrate its flange with the wall's water-shedding layers, and seal the perimeter with an exterior-rated sealant compatible with the cladding. The cap should include a functioning backdraft damper and suitable protection against pests and wind. Don't block the damper with excess sealant or insulation.
Rigid and flexible duct choices involve a clear trade-off:
- Rigid through a framed wall: Choose this for the cleanest route and strongest airflow.
- Flexible through a constrained cavity: Use it only when routing requires it, with full extension and proper support.
- Insulated duct through an unconditioned transition: Choose this when condensation control justifies the extra space and installation work.
Finish the interior opening after the duct is secure. The grille should sit flat, the fan collar should remain accessible for service, and the joint should be airtight before drywall compound or trim conceals it.
The following installation demonstration shows how the exterior termination and duct connection fit together:
Testing and Verifying Your Vent Performance
A bathroom fan is not commissioned when the grille is installed. It is commissioned when you confirm that air moves outdoors at useful volume. Run the fan and inspect the wall cap. The damper should open fully and stay clear of sealant, paint, bent metal, wind pressure, and debris. A fluttering or closed flap points to a restriction that needs correction.
At the room-side grille, hold a small piece of tissue paper against the intake. The tissue should remain against the grille while the fan operates, confirming basic suction. It does not prove that the system delivers its rated airflow. For a better check, use a calibrated hood or anemometer at the grille or termination. That measurement reflects delivered air, not just the force you feel at the opening.
Sound is not a performance test. A loud fan may be working against a blocked or undersized duct. A quieter fan with a short, smooth route can move more air.
Compare installation performance with the design target
For bathroom exhaust, the applicable ASHRAE reference is 50 cfm intermittently or 20 cfm continuously, as documented in the ASHRAE ventilation standard. Use that figure as a design target, then check the installed system after duct length, bends, the wall cap, and its damper add resistance.
Inspect the route while the fan runs. Check for crushed flex duct, leaking foil tape, a loose collar, a blocked screen, or a cap that fails to open. If airflow is weak, correct those restrictions before installing a stronger fan. More capacity cannot overcome a poorly configured route.
Keep the fan running after the shower
Run the fan during bathing and continue afterward. DOE guidance identifies a delay-off control of at least 10 minutes for indoor-moisture control, as described in its. A timer or humidity control keeps exhaust moving after the room looks clear, when moisture can still remain on surfaces and in the air. In East Texas, that final run time helps the wall system and finishes dry more reliably.
Common Mistakes That Undermine Wall Vent Installations
The most damaging error is exhausting into an attic, crawlspace, or wall cavity. The fan may sound normal and the bathroom may feel less steamy, but the building still contains the water vapor. Over time, that moisture can support mold, wood rot, and degraded insulation. A wall vent is successful only when the air reaches the exterior.
Another failure starts with the duct slope. A duct that slopes downward toward the fan gives condensate a path back into the equipment or wall. Unsupported flexible duct creates a similar problem by sagging into a low pocket. Keep the route supported, stretched, and slightly directed toward the cap.
The shortcuts that cause repeat problems
- Reducing the duct size: A smaller outlet or improvised reducer adds resistance and lowers delivered airflow.
- Using too many elbows: Each bend increases pressure loss, especially when combined with flex duct.
- Leaving joints unsealed: Leakage releases humid exhaust into the wall instead of outdoors.
- Skipping insulation: Ducts crossing unconditioned areas can collect condensation when warm exhaust meets cold surfaces.
- Installing a weak cap: A stuck damper, clogged screen, or poor weather seal can restrict flow and admit rain or pests.
- Relying on fan noise: Sound doesn't confirm that the fan meets its intended airflow.
East Texas humidity makes these shortcuts less forgiving. If the bathroom remains damp, inspect the route rather than assuming the fan needs more power. Also consider how penetrations and air-sealing details interact with the rest of the wall assembly. The vapor barrier installation guidance offers useful background on controlling moisture movement through building components.
A well-installed bathroom vent through wall system has a short discharge path, a correctly sized duct, an accessible exterior cap, sealed joints, an outward drainage slope, and measured performance. If you can't achieve those conditions without cutting into structural framing, rerouting utilities, or disturbing complex cladding, bring in a qualified contractor before the opening becomes a larger repair.
Home Pro's Remodeling & Repairs handles bathroom ventilation as part of coordinated remodeling and repair work, including exterior wall penetrations, duct routing, sealing, and finish restoration. If your Tyler or East Texas bathroom needs a properly planned exhaust upgrade, visit Home Pro's Remodeling & Repairs to request an onsite consultation or estimate.
Home Pro's Remodeling & Repairs, (903) 920-2969
Call (903) 920-2969More articles
7 Best Outdoor Kitchens: Designs, Costs, and Build Tips
Many outdoor kitchen problems begin on day one, when the layout, cover, and utility routes get decided before anyone looks closely at the budget.
Room Addition Above Garage: Planning Guide
Most advice about a room addition above a garage starts with floor plans, paint colors, and the question of whether you want a bedroom or office.