Room Addition Above Garage: Planning Guide
Most advice about a room addition above a garage starts with floor plans, paint colors, and the question of whether you want a bedroom or office.
October 10, 2026 · 13 min read
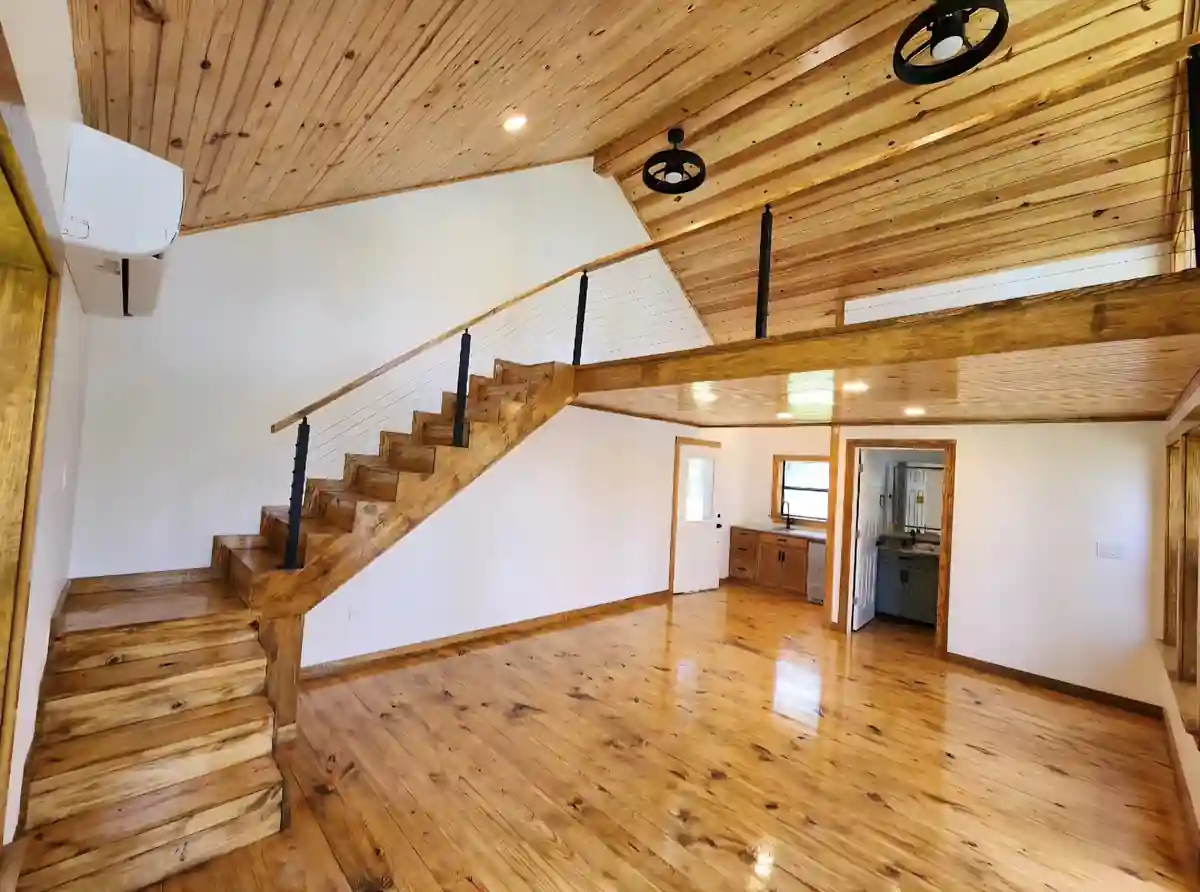
Most advice about a room addition above a garage starts with floor plans, paint colors, and the question of whether you want a bedroom or office. That's backwards. The first question is whether the garage can safely carry a habitable floor and keep vehicle exhaust, smoke, and fire separated from the people above it.
A garage is useful because it already occupies valuable ground area. HUD's summary of the 2009 American Housing Survey found that 66% of U.S. homes had a garage or carport, while 64% had three or more bedrooms, compared with 48% in 1973. Newly constructed homes were even more bedroom-oriented, with 80% having at least three bedrooms. Those figures don't prove that every garage can support an addition, but they explain why building upward is attractive where lots are constrained and households need more usable space. HUD's housing survey summary provides the broader context.
The practical rule is simple: engineer the existing structure before designing the new room. A room above a garage can become a bedroom, office, playroom, or guest suite, but only after the load path, fire separation, stairs, utilities, insulation, egress, and Tyler-area permitting requirements are understood.
Assessing the Existing Garage Load Path
An existing garage usually supports a roof, not a second story full of people, furniture, partitions, flooring, and mechanical equipment. Treating it as a ready-made foundation for living space is one of the most expensive assumptions a homeowner can make.
The load path runs from the new floor framing through beams, posts, walls, connections, footings, and soil. If one link is weak, adding stronger joists alone won't solve the problem. FEMA's seismic retrofit guidance specifically calls attention to homes with living space over garages, including weak wall sections beside the garage door, inadequate foundation anchorage, and resistance to overturning. In East Texas, wind resistance and local soil conditions still make those checks important even when seismic design isn't the main concern. FEMA's retrofit guidance for living space over garages is useful because it focuses on the failure points that finished surfaces hide.
What deserves inspection before design
A qualified design professional should document existing conditions through measurements, photographs, and exploratory openings where necessary. The assessment should address:
- Foundation capacity: Confirm footing width, depth, reinforcement, condition, and the connection between the slab and foundation system.
- Wall stability: Inspect narrow wall sections beside the garage door, wall bracing, anchor bolts, posts, headers, and signs of movement.
- Roof and ceiling framing: Determine whether existing members are roof rafters, ceiling joists, or part of a system that can be modified without losing lateral or vertical support.
- Connections: Check bearing points, hangers, straps, bolts, and the path that transfers new loads into the foundation.
- Damage and movement: Stop and investigate foundation cracks, settlement, water intrusion, damaged framing, unbraced walls, or previous roof alterations.
A wide garage door often leaves narrow wall sections that behave like portal-frame walls. Under wind loading, those sections can experience racking, uplift, and overturning. Depending on the calculations, the remedy might involve engineered steel columns, prefabricated shear walls, reinforced plywood or OSB panels, new foundation work, or a combination of measures.
Practical rule: Don't accept a fixed room layout or construction price until the contractor and engineer know what is inside the walls and under the slab.
The floor system also deserves careful detailing. Engineered joists, deeper framing, beams, and posts may all be valid solutions, but the connections matter as much as the members. Before choosing hardware, it helps to compare joist hanger methods so the selected system matches the actual bearing and load-transfer conditions. Homeowners considering a broader garage conversion can also review the planning issues involved in converting a garage to living space, although adding a story introduces more demanding structural work than a ground-level conversion.
Navigating Fire Separation and Egress Codes
A room over a garage can pass structural review and still fail the inspection that matters most. Fire separation and emergency escape usually decide whether that new space is legal, safe, and worth finishing at all.
The garage sits under a room people will sleep, work, or spend time in, while also storing vehicles, fuel, batteries, tools, and chargers. That combination changes the risk profile. The code intent is to keep fire, smoke, and garage exhaust from moving into the living space long enough for people to get out. Where habitable space is directly above, code guidance calls for 5/8-inch Type X gypsum board on the garage ceiling, with the rest of the supporting construction protected to match the adopted code and the approved assembly. 1/2-inch drywall is often what homeowners assume is there. It often is not enough.
Separate the garage before routing utilities
On a real job, the weak spots are rarely the big surfaces. They are the holes cut after the fact.
The separation assembly has to stay continuous across the garage ceiling, shared walls, and all the little interruptions that show up during construction. Beams, posts, rim boards, attic access panels, recessed cans, duct boots, wiring, plumbing, and steel all have to be detailed before the mechanical trades start drilling and cutting. If that order gets reversed, the crew spends the rest of the project patching penetrations and arguing with the inspector about whether the assembly still qualifies.
I see the same failures over and over. Exposed posts are left below the room framing. Recessed fixtures get installed in unapproved locations. Ducts run through the separation without the right sealing. Even a small shortcut can break the protection strategy, because the garage is also a source of carbon monoxide and other contaminants, not just fire. Approved penetrations need listed fire-stopping and sealing details, and the local authority has to accept the assembly being used.
The door between the garage and the dwelling deserves the same attention. Current IRC clarification requires a garage separation door to be self-closing and self-latching, and the opening arrangement still has to comply with the adopted local code. The IRC garage-door clarification is a good checkpoint, but East Texas jurisdictions may be on different code cycles. Verify the local edition before ordering doors and hardware.
Decide whether the space is a bedroom
Labels do not change code. Call it a bonus room if you want, but once the space is designed or used as a sleeping room, the egress requirements get more specific.
Under the 2018 IRC definition of a habitable attic, the accessible area must be at least 70 square feet, with a ceiling height of at least 7 feet over the required area. If the room will be used for sleeping, the emergency escape and rescue opening generally must provide:
- 5.7 square feet of net-clear opening
- A minimum opening height of 24 inches
- A minimum opening width of 20 inches
- A sill no more than 44 inches above the floor
- A smoke alarm inside the sleeping room
Those numbers drive real design decisions. A window schedule that looked fine on paper can fail once trim, sill height, roof slope, or furniture layout enters the conversation. The practical sequence is to classify the room first, then reserve space for a compliant stair, size the egress opening correctly, coordinate smoke and carbon-monoxide alarms, and keep the fire separation intact from the start.
Executing the Framing and Roof Tie-In
Once the structural design and life-safety details are settled, construction needs a controlled sequence. The crew shouldn't stack lumber, steel, drywall, and roofing materials on an unverified garage and hope the existing structure tolerates the load.
Start with an as-built survey. Measure the garage width, wall locations, ceiling height, roof geometry, door opening, existing floor elevations, and the relationship between the garage and the main house. Exploratory openings may be needed at the slab edge, foundation, wall bases, ceiling, and roof intersections. Those openings aren't wasted demolition. They reveal whether drawings match the structure that exists.
A sequence that protects the existing structure
- Document the garage. Record dimensions, framing sizes, bearing points, cracks, settlement, moisture damage, utilities, and previous alterations.
- Issue structural calculations. The engineer should specify added dead load, residential live load, environmental loads where applicable, lateral resistance, connections, and any temporary shoring.
- Confirm zoning and permits. Verify setbacks, height restrictions, egress, stair access, and the permit path before ordering structural materials.
- Reinforce the base first. Complete new footings, piers, posts, beams, anchors, shear walls, or other upgrades before transferring loads into the garage.
- Install the floor system. Set engineered joists or beams on verified bearing, maintain the designed alignment, and secure all connections before loading the platform.
- Frame the walls and roof. Tie the new walls into the structural design, maintain required openings, and brace the work as the roof is removed or altered.
- Weatherproof the tie-in. Install underlayment, step flashing, counterflashing, head flashing, and drainage details at every roof intersection before interior finishes begin.
Roof connections create recurring problems
The new roof has to shed water across old and new construction. A simple butt joint often fails because wind-driven rain finds discontinuities in the flashing, underlayment, siding, or roof plane. The designer should resolve roof pitch, drainage, fascia alignment, wall height, and window placement before the crew starts cutting the existing roof.
Floor alignment can create another surprise. If the garage ceiling sits below the home's existing second-floor line, the new room may need a step-up, a redesigned wall height, or a beam strategy that protects headroom. Stairs also consume real space. An interior stair may preserve convenient access but reduce garage function, while an exterior stair preserves the parking area but adds weatherproofing, railings, landings, and another exposed connection.
The sequence matters because reinforcement is much harder after the new floor, walls, and roof are in place. A contractor who frames first and investigates later is asking the homeowner to pay for rework.
Managing Insulation and Mechanical Systems
A room above a garage has two difficult boundaries. Below is an unconditioned space with vehicle exhaust and temperature swings. Above is a roof assembly that can absorb substantial heat. Treating the room like an ordinary interior addition often produces cold floors, overheated ceilings, drafts, and an HVAC system that runs constantly.
The floor assembly needs both thermal insulation and air control. Insulation between joists helps, but gaps around the perimeter, rim joists, wiring, pipes, ducts, and framing connections can bypass it. A continuous air-sealing strategy should close those paths while preserving the required garage fire separation. The fire-rated ceiling and the insulation plan need to be coordinated, not installed as unrelated layers.
Air quality comes before comfort
Shared walls and penetrations must be sealed carefully against garage air. That includes the perimeter of the floor assembly, electrical boxes, plumbing penetrations, duct boots, access panels, and any framing cavity connected to the garage. The room should have properly coordinated smoke and carbon-monoxide alarms, with locations and interconnection confirmed under the locally adopted requirements.
A room over a garage can feel comfortable while still having an unacceptable air pathway. Don't rely on paint, carpet, or a finished ceiling to stop exhaust. The separation assembly, approved sealants, fire-stopping, and pressure relationships all need to work together.
Air-sealing principle: A sealed penetration protects occupants and preserves the fire assembly. An unplanned penetration can compromise both.
Size the mechanical system for the room
Extending the existing HVAC system may work when the equipment has confirmed spare capacity, the duct route is short, and the new load has been calculated. It isn't automatically the right answer. Long duct runs, undersized returns, poor insulation around ducts, and a roof exposed to strong solar gain can leave the room uncomfortable even when a supply register is present.
A dedicated mini-split or a properly designed zone can provide independent control, but the equipment still needs sizing based on the room's envelope, windows, roof exposure, insulation, air sealing, and local conditions. A contractor evaluating options can also review the practical requirements to install a mini split in your garage, though a habitable room above the garage requires its own load calculation and distribution plan.
Bathrooms add another layer. Supply and waste lines need planned routes through the floor and walls, and every penetration must respect the fire-rated separation. Keep plumbing near existing wet areas where the framing and drainage design allow it, but don't force a convenient route through a beam, rated assembly, or critical connection.
Budgeting for Retrofit Versus Rebuild
The lowest initial bid isn't always the lowest-cost construction path. A retrofit may preserve the existing garage, but it can uncover inadequate footings, narrow wall sections, damaged framing, poor drainage, or connections that need extensive correction. Rebuilding from the slab costs more demolition and reconstruction, yet it can produce a clearer load path and fewer concealed compromises.
The estimate should separate known work from investigative allowances. Structural engineering, exploratory demolition, temporary shoring, foundation reinforcement, lateral upgrades, fire-rated assemblies, roof tie-in, HVAC, stairs, and permit-related work should not be buried inside a vague finishing allowance.
Compare the real cost drivers
The right comparison isn't “renovation versus new construction” in the abstract. It's the cost of making the existing load path reliable compared with the cost of replacing it with a known system. FEMA's guidance supports involving a design professional where wall anchorage, overturning resistance, or foundation work is involved, and it recommends experienced contractors for new-foundation or partial-replacement work.
Read the estimate for omissions
Ask whether the proposal includes structural calculations, exploratory openings, engineering revisions, temporary protection, and allowance for foundation work. A bid that covers only framing, insulation, drywall, and finishes may look attractive because it excludes the items most likely to create budget growth.
Don't use a universal price-per-square-foot figure as a substitute for investigation. A homeowner can review the planning factors behind an addition cost per square foot, but the actual project scope depends on the garage's condition, structural strategy, stairs, roof geometry, utilities, and finish level. The most honest early budget carries separate allowances until those conditions are verified.
Coordinating Permits and the Design-Build Timeline
A room addition above a garage involves several decisions that affect one another. The foundation affects framing. Framing affects stairs and window locations. Fire separation affects utilities. The roof affects exterior design and drainage. When the designer draws a layout without the builder and engineer testing those relationships, the homeowner often discovers the conflict after materials have been ordered.
A coordinated design-build process reduces that risk by bringing site investigation, engineering, estimating, permitting, and construction into the same conversation. It doesn't remove uncertainty, but it identifies uncertainty before it becomes demolition or change-order work.
A practical East Texas workflow
The first meeting should happen at the garage. The contractor documents access, garage-door geometry, foundation clues, roof connections, utilities, desired room use, and stair options. The homeowner should also identify whether the space is intended as a bedroom, office, guest suite, or flexible bonus room, because that decision affects egress and alarm planning.
A target budget comes before detailed design. That budget isn't a promise to build an unverified project. It gives the team a boundary for structural choices, finish expectations, and contingency planning. If the initial investigation shows that retrofit work is extensive, the homeowner can compare it with rebuilding before paying for a design that cannot be afforded.
Engineering and permit drawings follow the investigation. The package should show foundation upgrades, wall reinforcement, floor framing, roof tie-in, stairs, fire separation, egress openings, insulation, mechanical systems, and utility routes. Tyler and nearby East Texas jurisdictions may adopt different code editions or local amendments, so the authority having jurisdiction must confirm the requirements rather than relying on a generic online checklist.
Construction starts after approvals and procurement. Reinforcement comes before loading, floor framing comes before enclosure, and fire separation is coordinated before utilities close the ceiling. Inspections should be scheduled at the stages required by the local permit, with concealed structural and life-safety work documented before it disappears behind drywall.
Owners should also consider insurance and risk allocation before work begins. A general compliance resource such as the ABS Insurance Brokers compliance guide illustrates why coverage, responsibilities, and construction arrangements deserve review, although its jurisdiction is different from Texas and it doesn't replace advice from a Texas insurance professional.
The process described in how to build a home addition works best when the contractor manages design decisions, approvals, scheduling, and construction as connected tasks. For this type of project, that coordination is not administrative polish. It protects the load path, the fire separation, the budget, and the final occupancy goal.
Home Pro's Remodeling & Repairs provides design-build planning and construction for East Texas additions, including rooms above existing garages, offices, guest spaces, and expanded living areas. If you're in Tyler or a nearby community, visit Home Pro's Remodeling & Repairs to request an onsite consultation and discuss the structural assessment, permit path, and budget allowances before committing to a layout.
Home Pro's Remodeling & Repairs, (903) 920-2969
Call (903) 920-2969More articles
7 Best Outdoor Kitchens: Designs, Costs, and Build Tips
Many outdoor kitchen problems begin on day one, when the layout, cover, and utility routes get decided before anyone looks closely at the budget.
Bathroom Vent Through Wall: Complete DIY Installation Guide
You've just stepped out of the shower on a humid East Texas morning.