How to Plan a Kitchen Remodel: A Step-by-Step Guide
You can spend an afternoon choosing cabinet colors, save a dozen countertop photos, and still end up with a kitchen that frustrates you every morning.
August 31, 2026 · 12 min read
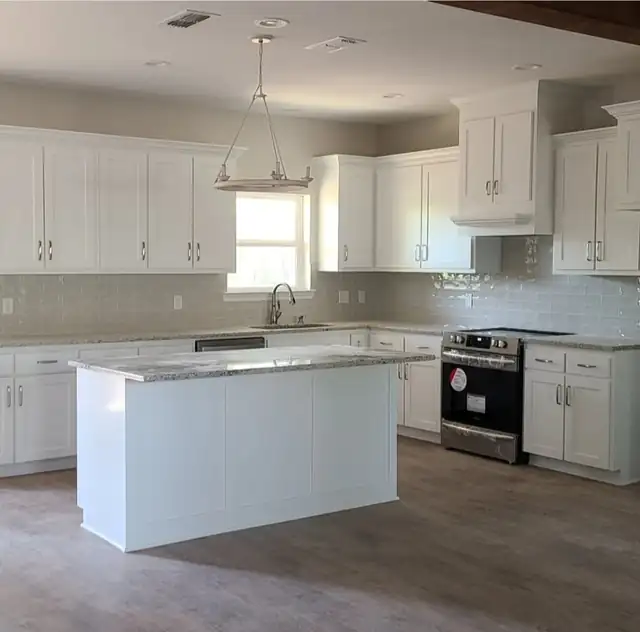
You can spend an afternoon choosing cabinet colors, save a dozen countertop photos, and still end up with a kitchen that frustrates you every morning. I've seen homeowners approve a beautiful island before anyone tested the walkway, then discover that two people can't pass each other without turning sideways. Others replace finishes while leaving the refrigerator, sink, and cooktop disconnected from the way they prepare food.
That's why how to plan a kitchen remodel starts with movement, clearances, and priorities, not paint samples. A sound plan defines what the room must do, establishes a budget before design choices become commitments, and tests the layout against daily routines, future mobility, entertaining, and resale goals. The finish selections matter, but they should serve the plan rather than drive it.
Introduction and Goal Setting
A homeowner may walk into a big-box showroom intending to browse, then leave with a cabinet quote and a head full of inspiration. The problem begins when that quote becomes the project plan. Cabinet dimensions get selected before appliance locations, the island gets sized for appearance, and lighting gets treated as a final decorative decision. By demolition day, the household has committed to a room that may look polished but still lacks useful prep space, practical storage, or a clear path between work zones.
Start by writing down the problems you want the remodel to solve. “Make it nicer” isn't specific enough to guide expensive decisions. “Create a clear landing area beside the refrigerator,” “reduce traffic through the cooking zone,” or “make everyday items reachable without a step stool” gives your designer and contractor something they can test.
Define success before choosing finishes
Talk through a normal weekday, not an idealized magazine scene. Who unloads groceries? Where do children or guests stand? Does one person cook while another washes dishes? Do you need space for a coffee station, baking, meal preparation, or serving? A kitchen that works for one cook may become hazardous when several people share it.
Your written priorities should also reflect the length of time you expect to stay in the home. Recent Houzz coverage of kitchen remodeling trends for 2026 describes homeowners rethinking layouts, planning for the long term, and investing in smarter, more functional kitchens without necessarily making them larger. That shift supports a practical question: Will this kitchen still work when your needs change?
Rank your goals in three groups:
- Must solve: circulation problems, failing plumbing, inadequate lighting, unsafe flooring, or unusable storage.
- Would improve daily life: a better pantry, quieter appliances, a more useful island, or a dedicated landing zone.
- Nice to have: decorative upgrades that can wait if the budget tightens.
This list becomes your decision filter. If a premium finish consumes money needed to correct the layout, it isn't serving the project. If an island makes the room harder to move around in, its size or shape needs reconsideration, regardless of how attractive it looks in a rendering.
Budget Planning and Cost Awareness
Kitchen costs spread widely because “remodel” can mean anything from replacing doors and hardware to moving walls, plumbing, electrical systems, and ventilation. A 2026 national kitchen remodel cost summary places the average homeowner project at about $26,941 to $26,974, while most homeowners spent roughly $14,589 to $41,547. The same source cites national 2025 Cost vs. Value benchmarks of $28,458 for a minor remodel, $82,793 for a major midrange remodel, and $164,104 for a major upscale remodel.
Those figures aren't a bid for your home. They're a warning against designing without a scope boundary. In major U.S. metros, some 2026 estimates place a typical mid-range project around $51,000 to $115,000, which shows how strongly location, labor, and material level affect the final number. The difference between a refresh and a full gut renovation can exceed $130,000, so decide which category your project belongs to before selecting products.
Build the budget around scope
Set a target budget that includes the work your layout requires, not just visible materials. Discuss cabinetry, installation, appliances, countertops, flooring, lighting, plumbing, electrical work, permits, disposal, painting, and finish carpentry. A kitchen remodeling cost guide from Home Pro can support that early conversation, but your contractor still needs to inspect the existing conditions before treating any estimate as reliable.
Use a category breakdown as a planning tool, not as a fixed national price promise. The accompanying visual allocates a sample budget across cabinetry and hardware, installation, appliances, countertops and flooring, labor, and other costs.
Protect the contingency
Major renovations frequently uncover conditions that weren't visible before demolition. One industry synthesis of renovation cost overruns reports that roughly 40% to 50% of major renovation projects exceed their initial budgets, with typical overruns of 10% to 20%. A separate cost-tracking finding cited there says hidden conditions, including water damage, outdated wiring, and code-required upgrades, drove overruns in 47% of major projects, with average overruns of 22% of the original budget.
Keep a dedicated contingency for concealed conditions and required work. Don't spend it on a better faucet during design, because that leaves no protection when demolition reveals damaged framing or an unsafe circuit. If the contingency remains unused, you can decide later whether to apply it to an upgrade.
Ask your contractor to identify allowances, exclusions, assumptions, and change-order procedures in writing. A clear budget discussion before design prevents the common cycle of approving attractive selections, discovering they exceed the target, and redesigning after time and money have already been spent.
Kitchen Layout and Workflow Design
The layout should be tested like a worksite. Start with the refrigerator, sink, and cooktop, then trace how ingredients move from storage to washing, preparation, cooking, serving, and cleanup. The familiar work triangle can help in a compact kitchen, while a longer linear food-flow path may work better in an open plan. The principle is the same, each essential movement should remain direct and unobstructed.
Measure the existing room and draw the doors, windows, radiators, vents, plumbing points, and electrical locations before sketching cabinets. Then mark the paths people regularly use. A beautiful island that sits in the route to the patio, pantry, or dining room may create more trouble than it solves.
Test clearances before cabinet dimensions
Universal design kitchen specifications recommend at least 48 inches of clear floor space in front of appliances and counters, 42 to 48 inches for work aisles, and about 60 inches of turning space where wheelchair maneuvering is required. Seated preparation areas need roughly 29 inches of under-counter clearance. These dimensions aren't merely accessibility details. They help a kitchen remain usable when several people work in it or when a household's mobility needs change.
Check landing space beside the refrigerator, sink, and cooktop. Confirm that an open oven or dishwasher won't cut across the primary route. Use cardboard, painter's tape, or a temporary full-scale island outline on the floor. Walk through unloading groceries, filling a pot, opening the refrigerator, and loading the dishwasher before approving the drawing.
A single counter height can also exclude users or make certain tasks uncomfortable. Multi-height counters around 30, 33 to 36, and 42 inches are recommended for different users and activities, according to the same universal design reference. The right combination depends on the household, but the broader lesson is simple: plan surfaces around people and tasks, not just a continuous visual line.
Decide whether the footprint needs to change
Many homeowners assume an addition will solve a cramped kitchen. Recent Houzz trend reporting says 68% of homeowners aren't expanding their kitchens during renovations, and most homeowners who do expand make only slight increases. That supports evaluating reallocation first. Removing a narrow cabinet run, improving pantry storage, relocating an appliance, or reducing an oversized island may create more useful space without changing the exterior shell.
Practical rule: Don't add square footage until you've proved that the existing footprint can't support the workflow you need.
Expansion can make sense when structural walls, inadequate storage, or a serious circulation conflict cannot be resolved inside the current room. But it also introduces more design, structural, exterior, and permit decisions. Compare that disruption with a reconfiguration that preserves the shell and concentrates money on the parts you touch every day.
The following video offers another visual reference for thinking through kitchen planning and layout decisions.
Choosing a Contractor and Design Approach
Choose the contractor model after the workflow and footprint are clear. A beautiful rendering cannot rescue tight clearances, awkward appliance access, or an island that blocks the main path. The right team should test those conditions before refining finishes or encouraging an expansion.
A traditional arrangement pairs an architect or independent designer with a general contractor. It suits projects that need detailed drawings and an owner who can manage communication between separate businesses. A design-build firm keeps design coordination and construction management under one roof. One team can develop the layout, match selections to the budget, schedule trades, and manage construction. Fewer handoffs can simplify decisions, but you still need to read the agreement and confirm responsibility for design changes, approvals, purchasing, and site decisions.
Compare the working models
The figures come from historical kitchen renovation ROI benchmarks. They do not guarantee resale performance. They do show why scope discipline matters. A costly remodel may provide substantial daily value, while upscale finishes do not automatically produce a proportional return. Before approving an addition, compare its cost with a reconfiguration that improves storage, clearances, and appliance access inside the existing shell.
Use the consultation to test the team
Bring written priorities, rough measurements, appliance preferences, and the target budget to the first meeting. Ask how the firm will turn the workflow into drawings, pricing, selections, purchasing, and a buildable sequence. A contractor who focuses only on cabinet styles has not yet addressed the decisions most likely to create trouble.
Ask:
- Scope clarity: Which walls, utilities, finishes, and fixtures are included?
- Budget control: Which assumptions and allowances can change the price?
- Change orders: How will hidden conditions be documented and approved?
- Scheduling: Which appliances, cabinets, and materials must be ordered early?
- Communication: Who answers questions, and where are decisions recorded?
- Quality control: Who checks cabinet dimensions, rough-ins, and finish work?
Verify licensing and insurance. Request recent kitchen examples with similar layout or structural demands, then speak with references about communication and workmanship. Homeowners comparing firms can review local contractor options for Tyler, Texas.
Set the budget before design advances too far. If the plan exceeds it, revise the scope with the same attention given to workflow. Late substitutions can weaken the design, delay approvals, and force spending decisions under pressure. A written allowance schedule and clear change-order process keep those choices visible before construction begins.
Navigating Permits and Project Timeline
Permits depend on the work and the municipality, so don't rely on a neighbor's experience or a showroom employee's assumption. Cosmetic changes may not require the same approvals as structural work, plumbing relocation, electrical changes, or HVAC modifications. Ask your contractor or local building department to identify the required permits before demolition begins.
A practical permit checklist starts with the plan set. Confirm whether the municipality needs floor plans, cabinet layouts, electrical diagrams, structural details, or mechanical information. Then establish who submits the application, responds to plan-review comments, pays fees, schedules inspections, and receives final sign-off.
Match permits to the construction sequence
Keep a copy of the approved plans and permit information on site. Inspections commonly occur after rough plumbing, electrical, or other concealed work is complete but before walls and ceilings are closed. If the crew covers work before an inspector reviews it, reopening the area can create avoidable labor and schedule problems.
Use this sequence as a planning framework:
- Discovery and design approval: Verify conditions, finalize the layout, approve selections, and confirm the target budget.
- Permit processing and procurement: Submit required documents and coordinate cabinet, appliance, countertop, and specialty-material availability.
- Demolition and rough-in: Remove existing finishes, expose concealed conditions, and complete structural, plumbing, electrical, and ventilation work.
- Installation: Set flooring and cabinets in the correct order, then coordinate countertops, appliances, fixtures, and lighting.
- Finishes and closeout: Complete backsplash, paint, trim, hardware, testing, punch-list work, and final approvals.
The provided visual illustrates a 12-week sample schedule divided into design and permitting, demolition and rough-in, installation, and finishes. Treat it as a framework rather than a guaranteed duration for your home.
Ask about dependencies and delays
Your contractor should explain which tasks can proceed in parallel and which must wait. Countertop templating, for example, generally depends on accurately installed and leveled cabinets. Appliance specifications may affect cabinet openings, electrical connections, water lines, and ventilation, so confirm models before the cabinet order is finalized.
A kitchen remodel permit guide can help you prepare questions, but local officials make the final determination. Build buffer around inspections, material arrivals, concealed-condition repairs, and homeowner decisions. Every late selection can hold up another trade, especially when the replacement product requires a different dimension or connection.
Cost-Saving Strategies and Pre-Construction Prep
The safest savings come from removing unnecessary scope before choosing finishes. As noted earlier, minor remodels have historically recovered more at resale than major upscale projects, while larger midrange and upscale renovations often return less than modest updates. That does not make a major remodel wrong. It means the budget should first address workflow, storage, lighting, durable surfaces, and layout problems that affect daily use. Confirm whether the kitchen needs a larger footprint at all. Reconfiguring the existing room can solve circulation and work-zone issues without adding construction, foundation, or exterior-wall costs.
Retaining sound cabinet boxes can also control spending when the layout works and the boxes are level, dry, and structurally sound. New doors, drawer fronts, hardware, paint, and countertops can change the room without rebuilding every cabinet. Refacing will not correct poor storage or an awkward workflow, so inspect the boxes and test the proposed layout before treating it as a shortcut.
Make decisions before demolition
A slower construction period may offer more scheduling flexibility, depending on the contractor and local demand. Ask directly rather than assuming a seasonal discount exists. Planning time can help, but material availability and trade schedules still determine the start date.
Prepare the house with a written checklist:
- Temporary kitchen: Keep a refrigerator, microwave, electric kettle, basic dishes, and a washable prep surface in another room.
- Dust control: Protect adjacent floors, doorways, furniture, and return-air paths before demolition.
- Selections: Approve fixtures, appliances, cabinet hardware, lighting, flooring, and finish materials before the crew needs them.
- Decision log: Record model numbers, colors, approvals, allowances, and changes in one shared document.
- Communication plan: Set regular check-ins and identify who can authorize a change order.
- Site access: Confirm delivery paths, parking, working hours, waste removal, and pet or child restrictions.
- Closeout expectations: Agree on testing, cleanup, warranty information, and the punch-list process.
Late changes are expensive because they can force completed work to be removed, reordered, or installed by another trade.
Home Pro's Remodeling & Repairs provides design-build kitchen remodeling, including layout updates, cabinets, countertops, flooring, backsplashes, and lighting, with onsite consultations and estimates for East Texas homeowners. If your project is in Tyler or a nearby community, visit Home Pro's Remodeling & Repairs to discuss the existing footprint, workflow priorities, target budget, and construction plan before committing to finishes.
Home Pro's Remodeling & Repairs, (903) 920-2969
Call (903) 920-2969More articles
7 Best Outdoor Kitchens: Designs, Costs, and Build Tips
Many outdoor kitchen problems begin on day one, when the layout, cover, and utility routes get decided before anyone looks closely at the budget.
Bathroom Vent Through Wall: Complete DIY Installation Guide
You've just stepped out of the shower on a humid East Texas morning.