How to Remodel Bathroom on a Budget Without the Guesswork
You've probably opened Pinterest, saved a dozen bathroom photos, and then checked the price of the first vanity you liked.
September 30, 2026 · 13 min read
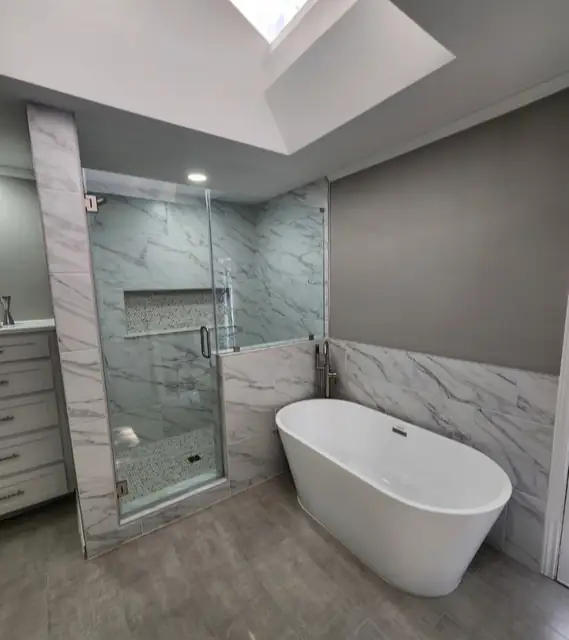
You've probably opened Pinterest, saved a dozen bathroom photos, and then checked the price of the first vanity you liked. That's how a modest refresh turns into a project that competes with a full renovation. The better way to remodel a bathroom on a budget is to decide what stays, inspect what's hidden, and spend money where labor and water exposure make the biggest difference.
A budget remodel doesn't mean choosing the cheapest product in every category. It means refusing to pay for unnecessary demolition, relocated plumbing, repeated trade visits, or finishes that hide an unresolved moisture problem. Keep the room's basic layout, protect the wet areas, and choose materials that look intentional without demanding excessive installation time.
Why Bathroom Budgets Blow Up and How to Stay Ahead of It
Most bathroom budgets fail before the first tile is installed. Homeowners price the visible items, such as tile, faucets, mirrors, and vanities, while overlooking the work required to remove old materials, prepare uneven surfaces, inspect plumbing, repair damage, and coordinate several trades.
Labor commonly represents 40% to 65% of a bathroom remodel budget, according to Home Depot's bathroom remodeling cost guide. That makes scope control more important than finding a slightly cheaper faucet. Every extra demolition task, design change, trade visit, and inspection adds time, and labor time is usually more expensive than the material being installed.
Start with scope, not finishes
Write down exactly what you're changing. A cosmetic refresh might include paint, a mirror, lighting, hardware, a vanity, and a faucet while leaving the toilet, shower, and drain locations alone. A structural remodel involves opening walls, changing the floor plan, moving utilities, or rebuilding the wet area.
Those are different projects, even if they occupy the same room. Treating them as interchangeable is how homeowners spend their finish budget before discovering that the shower valve or subfloor needs attention.
Before buying anything, inspect for:
- Moisture damage: Look for soft flooring, staining, musty odors, swollen trim, and deteriorated drywall near the tub or shower.
- Plumbing risk: Identify old shutoffs, corroded connections, nonstandard supply lines, and fixtures that may be difficult to service.
- Ventilation problems: Confirm where the exhaust fan discharges and whether humid air is being trapped in an attic or crawlspace.
- Surface defects: Check walls and floors for movement, unevenness, loose tile, and damage that will make new finishes look poor.
Practical rule: If the project requires opening a wall or floor, treat the hidden condition as part of the budget conversation, not as an unlikely surprise.
Four decisions control most of the result. Set a realistic budget, draw a firm DIY boundary, follow the correct work sequence, and choose materials based on installed cost rather than showroom price. Homeowners who want a more detailed approach to controlling additions and changes can use this scope creep prevention guide.
The cheapest remodel is rarely the one with the lowest material receipt. It's the one that avoids unnecessary labor while protecting the structure behind the finishes.
Setting a Realistic Budget You Can Hit
A usable bathroom budget starts with the work category, not a mood board. Keeping the existing layout leaves more money for visible improvements. Moving plumbing, altering walls, or rebuilding a shower increases labor, coordination, inspection, and repair costs before you choose a single finish.
Published 2025 to 2026 cost data places typical homeowner spending at about $12,151, with common projects ranging from $6,651 to $17,657, according to This Old House's bathroom remodel cost guide. NerdWallet's bathroom remodel cost resource places average spending near $9,521 and cites $245 to $466 per square foot for a 40-square-foot full bath. Those figures show why scope matters more than the finish board.
Compare the scope before comparing the products
Build the budget in three layers. First, list hard costs, including labor, materials, permits, delivery, disposal, and inspections. Labor usually consumes 40% to 65% of the total, so a cheap material choice cannot rescue an inefficient scope. In East Texas, written local bids matter more than national averages because travel, trade availability, and project conditions affect installation costs.
Second, reserve a contingency before selecting finishes. The National Association of Home Builders guidance summarized by NerdWallet supports planning for unexpected conditions. That source notes that permits can commonly add about $100 to $1,000, demolition and preparation can add roughly $1,000 to $2,300, and relocating plumbing or electrical can add about $5,000.
Third, create a separate finish allowance. Keep decorative upgrades from consuming money needed for a shower valve, exhaust fan, subfloor repair, waterproofing, or inspection. Visual-finish guides often miss moisture damage and failing systems behind the surfaces. Downgrade the tile or hardware first, not the work that keeps water out.
Budget test: Approve a finish only after the project can still pay for rough-in work, moisture protection, permits, and discovered damage.
Compare contractor scopes line by line. Ask whether each quote includes demolition, disposal, waterproofing, ventilation, permit handling, finish installation, and cleanup. For broader context, review 2026 bathroom renovation costs and how much a bathroom remodel costs, then use East Texas proposals to set the actual budget. DIY savings are reasonable for finish work, but pay a qualified trade when a mistake could expose moisture or require reopening a wall or floor.
DIY vs Hiring Out Where the Line Really Falls
DIY savings make sense when the task is visible, reversible, and unlikely to damage the structure. They disappear when a mistake requires opening a finished wall, removing tile, drying framing, or correcting a failed inspection.
Use this simple test: if the mistake requires opening a wall or floor, hire the work out. If it requires another trip to the hardware store, consider doing it yourself. That rule separates sensible homeowner labor from false economy.
Work that usually makes sense for a homeowner
Demo is a good candidate if you can protect nearby rooms, control dust, identify utilities, and remove debris safely. Don't swing a sledgehammer blindly around a shower valve or electrical box. Remove trim carefully, photograph exposed conditions, and stop when you reach wiring, plumbing, or structural material.
Painting, mirror installation, towel bars, toilet paper holders, shelves, and other accessories are also reasonable DIY work for a careful homeowner. Vanity assembly can work too, provided the cabinet is properly secured and the existing supply and drain locations line up.
Work that should stay with qualified trades
Waterproofing, shower pans, shower valves, drain relocation, electrical work, ventilation ducting, and plumbing inside walls belong with professionals. These tasks can fail behind the finish, where you won't discover the problem until water damage, mold, unsafe wiring, or a code issue appears.
Tile setting sits in the middle for dry areas, but wet-area tile is less forgiving. A professional should handle the waterproofing system and shower pan. If you're experienced with tile, you may be able to handle a simple backsplash or small, flat floor after the substrate is properly prepared.
In East Texas, humidity makes ventilation and moisture management especially important. The EPA's remodeling guidance recommends checking that the bathroom fan works properly during renovation, while the Building America Solution Center specifies that the fan should vent directly outdoors, not into an attic or crawlspace.
Selective subcontracting is often the practical middle ground. You can remove finishes, paint, assemble the vanity, and install accessories while a plumber, electrician, ventilation specialist, or wet-area tile installer handles the failure-prone work. That arrangement reduces labor exposure without asking you to gamble on concealed systems.
The Right Order of Operations for a Budget Remodel
Sequence protects your money. The wrong order forces finished work to be removed, while the right order gives every trade access to the area it needs before the next layer covers it.
1. Document and demolish carefully
Remove accessories, trim, fixtures, wall coverings, and old flooring according to the agreed scope. Photograph every pipe, wire, valve, vent, and framing condition before covering anything. Label shutoffs and take measurements while the room is open.
Open the floor around the tub or shower zone and inspect the subfloor. Look for rot, staining, movement, and deteriorated framing. A new floor installed over a damaged base is not a budget decision. It's a delayed repair.
2. Resolve hidden conditions before rough-in
Repair moisture damage, replace failed framing, correct an uneven subfloor, and address old or leaking connections before the walls close. Keep the existing supply and drain locations whenever they work safely and functionally. Moving fixtures may improve the drawing but often adds labor, inspection, and coordination that don't improve the room enough to justify the cost.
Set aside a contingency for concealed damage before ordering decorative materials. The 2025 Houzz Bathroom Trends Study reports that 61% of homeowners enhanced ventilation, heating, or plumbing systems, and ventilation fans were the most common system add-on at 58%. Those figures reinforce a point many finish-focused plans miss. A real bathroom renovation often includes system work.
3. Complete rough plumbing and electrical
Do plumbing and electrical work while the walls are open. Install the shower valve, verify supply connections, prepare lighting and receptacle locations, and route the exhaust duct to the exterior where required. Arrange inspections before closing walls if local rules require them.
For additional plumbing-specific planning, use this homeowner-focused renovation advice from EZ Plumbing as a supporting checklist. Local code requirements still control the work, so confirm them with the responsible trade or authority.
4. Close, waterproof, and tile
Use materials rated for the intended zone. Cement board or another approved wet-area backing belongs where the waterproofing system requires it. Install the shower pan and waterproofing membrane, then verify transitions, penetrations, corners, and drains before tile covers them.
Install the bathroom floor after the substrate is sound and prepared. Keep dust-producing work away from completed finishes whenever possible. A tub surround should be installed at the appropriate point before adjacent drywall finishing creates a fragile, finished edge.
5. Install finishes last
Set the vanity, toilet, faucet, mirror, lighting, hardware, paint, and accessories after the wet work has passed inspection and the tile has cured. Caulk changes of plane and fixture transitions with the correct product. Don't rush the final sealing just because the room looks finished.
A deliberate pause before adding an unplanned feature is cheaper than redoing completed work. If a new niche, relocated fixture, or upgraded tile enters the conversation, stop and re-quote the scope before approving it.
Material Tradeoffs That Save the Most Money
Choose materials by installed cost, not shelf price. A product that costs less per box can demand more cutting, leveling, waterproofing, trim, adhesive, or specialized labor. A slightly more expensive finish can be the better budget choice if it installs quickly and tolerates normal bathroom use.
Start with the large visual surfaces. Keep the tile pattern simple, select standard sizes, and avoid layouts that create excessive cuts around niches, corners, valves, and floor penetrations. Use one consistent finish for faucets, cabinet pulls, towel hardware, and lighting so modestly priced pieces look coordinated.
Compare the full system
Don't choose a shower system only by the panel price. Compare the wall preparation, waterproofing, trim pieces, drain, valve, labor, and future service access. For homeowners considering natural materials, this bathroom stone floor guide from Varun Marbles provides useful selection context, but stone still needs careful evaluation for slip resistance, maintenance, and installation requirements.
Material rule: Spend on the surface people touch and the system that keeps water out. Save on decorative complexity, custom sizing, and finishes that add labor without improving performance.
Lighting and storage are inexpensive ways to make a small bathroom feel more deliberate. Use a well-placed mirror, functional wall storage, and layered lighting rather than assuming the room needs a full cabinet replacement. Current budget trend coverage emphasizes warmer neutrals, natural materials, practical wet-area layouts, paint, lighting, and hardware as ways to modernize without gutting the room. You can also compare wet-area options through this guide to tile shower remodel cost, especially before choosing a fully tiled enclosure.
The Hidden Upgrades That Protect Your Budget
A bathroom can look finished and still hide the failures that consume a remodeling budget. Labor often takes 40% to 65% of the project total, so opening walls or floors later means paying for the same access twice. In East Texas, persistent humidity makes ventilation, waterproofing, and concealed connections poor places to cut costs.
Ventilation comes before paint
The exhaust fan should move humid air outdoors, never into an attic or crawlspace. The EPA recommends checking the fan during renovation, and replacing an existing ceiling fan with usable ductwork can cost roughly $150 to $350. A new ducted installation commonly runs $300 to $800, according to This Old House's cost guidance.
Pay for the correct fan and duct route before upgrading paint or trim. That work protects drywall, framing, insulation, and tile assemblies from persistent moisture. In an older East Texas home, a fan that turns on may still move too little air. A homeowner can replace a compatible fan, but duct routing and attic work belong to a qualified professional.
Waterproof the wet zone completely
Tile and grout shed water, but neither creates a waterproof shower assembly. Use compatible backing, a continuous waterproofing system, sealed penetrations, treated corners, and a drain installed according to its instructions.
Inspect the wet zone before closing the walls. Photograph the membrane, plumbing, and valve locations for future service. A DIY installer can follow a tested waterproofing system carefully, but a professional should handle complicated transitions, damaged framing, or conditions that are difficult to verify.
Replace weak connections while access is easy
Old shutoffs, corroded supply connections, worn shower valves, and questionable drain joints cost less to repair while the wall or vanity area is open. Replace a connection you already distrust instead of burying it behind new finishes.
Check the subfloor at the same time. Replace damaged material, support its edges, and create a stable base before underlayment and flooring. New tile cannot stop movement below it, and fixing that movement after installation adds labor and demolition.
Protect electrical and service access
Use the required GFCI protection for bathroom receptacles and follow local electrical rules. Keep shutoffs accessible, preserve service access for equipment, and avoid burying mechanical connections behind permanent finishes. Electrical changes, new circuits, and uncertain existing wiring should go to a qualified professional.
The 2025 Houzz Bathroom Trends Study found that 61% of homeowners enhanced ventilation, heating, or plumbing systems. Budget for those hidden upgrades before decorative work. Paint, hardware, and accessories can wait. Water control, air movement, safe wiring, and repair access cannot.
Your 90-Day Budget Remodel Action Plan
A 90-day plan works when each phase has a decision gate. Don't order finishes before the scope is priced, don't close walls before rough-ins are checked, and don't install final accessories before the wet areas are proven sound.
Days 1 to 30, plan and lock
- Set the budget: Separate hard costs, contingency, and finish selections.
- Define the scope: Mark every item that stays, changes, or moves.
- Inspect the room: Check ventilation, subfloor, plumbing, wiring, and moisture signs.
- Select two finish tiers: Choose an acceptable option and a preferred option for each major surface.
- Get trade quotes: Price plumbing, electrical, ventilation, waterproofing, and tile work separately where practical.
- Confirm permits: Ask who handles permits and inspections before demolition begins.
- Order long-lead items: Confirm the vanity, toilet, valve, surround, lighting, and tile are available.
Days 31 to 60, demo and rough-in
- Protect adjacent rooms: Seal dust paths and cover floors outside the bathroom.
- Photograph utilities: Record every exposed pipe, wire, vent, and framing condition.
- Open the wet zone: Inspect the subfloor and framing before covering anything.
- Repair damage: Resolve rot, leaks, mold-related conditions, and unstable surfaces.
- Complete rough-ins: Install plumbing, electrical, and ventilation work while access is open.
- Check the layout: Confirm fixture locations before walls and backing are closed.
- Pass required inspections: Don't cover work that still needs approval.
- Reconfirm the balance: Re-quote any added scope before buying upgraded finishes.
Days 61 to 90, build and finish
- Close the walls: Use approved materials for dry and wet areas.
- Waterproof the shower: Verify the membrane, corners, penetrations, pan, and drain.
- Install flooring and tile: Follow the planned sequence and allow proper cure time.
- Set the vanity and toilet: Confirm level, secure mounting, and accessible shutoffs.
- Install fixtures and lighting: Test connections before final caulk and touch-up paint.
- Complete accessories: Anchor mirrors, shelves, towel bars, and storage securely.
- Seal the room: Finish grout sealing and caulk transitions as required.
- Run the walkthrough: Test GFCI protection, verify fan operation and outdoor discharge, check for leaks, and photograph completed work.
- File documents: Keep product instructions, receipts, permits, warranties, and workmanship information together.
Reserve a 10% to 20% contingency before materials are purchased, as recommended in the EPA and cost-planning guidance summarized earlier. Don't use it to justify a design upgrade. Keep it for concealed moisture damage, subfloor repairs, plumbing corrections, or code-related work.
Home Pro's Remodeling & Repairs provides bathroom remodeling, ventilation, fixture, tile, shower, tub, and interior renovation services for homeowners in Tyler and surrounding East Texas communities. If you want the layout, system risks, and finish choices priced as one coordinated scope, visit Home Pro's Remodeling & Repairs to request an onsite consultation and estimate.
Home Pro's Remodeling & Repairs, (903) 920-2969
Call (903) 920-2969More articles
7 Best Outdoor Kitchens: Designs, Costs, and Build Tips
Many outdoor kitchen problems begin on day one, when the layout, cover, and utility routes get decided before anyone looks closely at the budget.
Bathroom Vent Through Wall: Complete DIY Installation Guide
You've just stepped out of the shower on a humid East Texas morning.