Outdoor Kitchen Island: Build Guide 2026
You're standing on a hot Tyler patio with a new grill in mind, but the practical questions arrive quickly.
October 8, 2026 · 11 min read
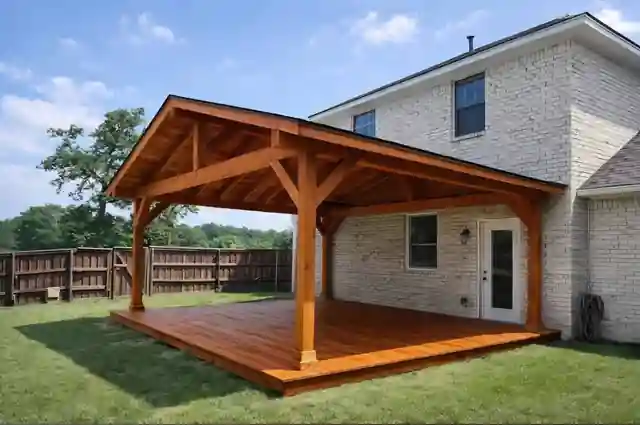
You're standing on a hot Tyler patio with a new grill in mind, but the practical questions arrive quickly. Where will prep happen when the lid is open? How will rain drain after a storm? Where will cookware, cushions, and drinks go when humidity settles in for the season? An outdoor kitchen island that looks impressive on installation day can become expensive clutter if it isn't planned for the weather and the way your household lives.
A durable design treats the island as part of the home's outdoor infrastructure. That means coordinating utilities, selecting materials that tolerate heat and moisture, protecting the work area, and leaving enough flexibility for future use. The grill matters, but year-round comfort, maintenance, access, and drainage usually determine whether you'll keep using the space.
Why an Outdoor Kitchen Island Is More Than a Grill Station
The modern outdoor kitchen has moved beyond a freestanding grill beside a patio chair. The National Kitchen & Bath Association's outdoor-kitchen profile estimated that approximately 500,000 American households had an outdoor kitchen and reported typical spending of about $13,000, while 25% of respondents built high-end kitchens costing more than $30,000. Those figures are historical, based on research collected in 2019, so they shouldn't be treated as a current Tyler quote. They do show how widely the term “outdoor kitchen” can range.
A simple grill station may have a short counter and a storage door. A full outdoor kitchen island can include permanent cabinetry or masonry, countertops, gas or electrical service, water, drainage, refrigeration, lighting, seating, and protected prep space. The NKBA profile placed the typical footprint at approximately 100 to 400 square feet, including sitting space, which supports a more useful interpretation: this is an integrated living zone, not just a place to set a grill.
Design the surrounding room
Houzz's 2026 outdoor-remodeling findings reported that 95% of homeowners building an outdoor kitchen were starting from scratch, and 68% included plumbing, electrical, or heating work. The same research is summarized in Houzz's outdoor remodeling trends report. That level of infrastructure changes how you should approach the project. The island needs a location with workable utility routes, safe clearances, reliable drainage, and enough shade to remain usable during East Texas heat.
A good layout also considers activities that happen when nobody is grilling. You may need a place for morning coffee, homework, conversation, or serving food during a stormy afternoon. Homeowners comparing ideas for indoor-outdoor living spaces should assess the patio, shade structure, doors, lighting, and seating as one connected system.
Practical rule: Choose appliances after you decide how the space should function on an ordinary weeknight, not only during a large gathering.
If you're comparing regional design approaches or want to find outdoor kitchen specialists, look for teams that discuss utility access, water management, and maintenance rather than presenting only appliance packages. The island earns its footprint when it stays comfortable, cleanable, and useful through heat, rain, and changing household routines.
How to Sequence Utilities and Permits Before Framing
A sink added after the island is closed can mean cutting masonry, replacing a countertop, and reopening finished walls. In East Texas, the same problem becomes harder after heavy rain or prolonged humidity exposes poor drainage and inaccessible connections. Draw the utility plan before framing, while every route remains visible.
Follow the installation order
Set appliance locations. Mark the grill, refrigerator, sink, cooktop, lighting, receptacles, and any future appliance. Check manufacturer clearances, then identify each connection for gas, electricity, water, drainage, or ventilation.
Confirm local requirements. Ask the authority having jurisdiction in Tyler or your municipality about gas, electrical, plumbing, structural, and covered-area permits. A patio project may require several inspections. Use this permit guidance for kitchen remodeling to prepare questions, then confirm the requirements with your local building department.
Route services while the island is open. Install gas, electrical, water, and waste lines before panels or countertops conceal them. Provide accessible shutoffs, service panels, and access doors. If you are considering a flexible gas connection, review Can You Use Flex Gas Line Outside and follow the appliance listing, installation instructions, and local code.
Test before closing. Gas lines require pressure testing before inspection, and drainage should be checked while leaks remain easy to locate. The outdoor kitchen construction guide from Projul recommends an individual shutoff for each gas appliance, a main supply shutoff, and a sediment trap at appliance connections.
Close the enclosure after approval. Install weather-resistant panels and counters only after testing is complete and the inspector or qualified trade confirms the work. Keep valves, junctions, and service components reachable for repairs.
Keep water moving away
East Texas humidity can keep trapped moisture inside an island for long periods. Give the patio or island surface a fall of approximately one-quarter inch per foot away from structures, and check that runoff cannot flow toward the house or collect inside the base. A covered island still needs a drainage plan for wind-driven rain.
Provide ventilation openings near both the lower and upper portions of enclosed cabinets. That airflow helps reduce moisture accumulation, while removable access panels make it easier to inspect connections after storms.
Do not bury a connection nobody can reach or seal the enclosure before gas, water, waste, and electrical systems have passed their tests. A little planning before framing prevents expensive demolition later.
Choosing Countertops and Cabinets That Handle East Texas Weather
Outdoor materials fail differently than indoor materials. Direct sun heats a dark counter, a sudden storm wets the base, and humid air lingers inside a cabinet enclosure. Choose each surface for its exposure, maintenance requirements, and repairability, not only for the showroom sample.
Compare the major options
Granite remains a practical countertop choice because it handles heat and resists staining when properly selected and maintained. It still needs sound installation and attention to seams, especially where water can sit. Lighter colors can feel more comfortable in intense sun because they absorb less heat than dark stone.
Quartz requires caution. Indoor quartz isn't automatically suitable for an exposed patio. Prolonged direct sunlight can affect some products, so choose a surface specifically rated for outdoor use and verify the manufacturer's warranty.
Concrete offers design flexibility. It can be cast in custom shapes and coordinated with the patio, but it needs appropriate sealing to limit moisture penetration. Homeowners considering a polished finish can review, then confirm that the selected system is appropriate for exterior exposure.
Cabinet construction deserves the same scrutiny. Stainless steel resists corrosion and cleans readily, while powder-coated aluminum provides a lighter enclosure with useful weather resistance. Avoid particle board and untreated interior cabinetry outdoors. Humidity can swell the substrate, break down edges, and delaminate finishes long before the countertop shows a problem.
For homeowners comparing quartz and granite countertops for kitchens, remember that outdoor exposure changes the selection criteria. Ask about UV resistance, thermal movement, sealing, replacement parts, and warranty exclusions. Pollen, mud, grease, and heavy rain are normal operating conditions in Tyler, so the best material is often the one you can clean and repair without special treatment.
Understanding Outdoor Kitchen Island Costs and Appliance Choices
Appliance count can turn an outdoor kitchen island into a costly service project, especially in East Texas, where humidity, storms, and power interruptions affect year-round use. Houzz's 2026 coverage found that 85% of outdoor kitchens included a grill, 62% a beverage refrigerator, 59% a sink, 49% a faucet, 36% a cooktop, and 29% a pizza oven. Those figures show adoption patterns, not a required equipment list, as reported in Houzz's 2026 outdoor remodeling coverage.
Choose the appliance that will earn its space first. A properly sized built-in grill needs landing space on both sides, durable storage, task lighting, and service access. Add a sink if washing produce, filling pots, or cleaning outdoors will reduce repeated trips through the house. A beverage refrigerator can support regular entertaining, but it also requires a dedicated electrical load, ventilation, weather protection, and maintenance after severe weather.
Spend on infrastructure before novelty
The historical NKBA figures, approximately $13,000 for typical spending and more than $30,000 for reported high-end kitchens, come from 2019 data. The figures are not a 2026 construction estimate, but they illustrate how quickly materials, appliances, utility work, and site preparation can separate a basic island from a premium installation.
A pizza oven may suit frequent gatherings, yet occupy counter space during the rest of the year. A second burner may help one household and sit unused in another. Put early budget into weather-resistant construction, correctly sized gas and electrical service, drainage, lighting, and accessible shutoffs. Those decisions support later appliance changes and make storm cleanup safer.
Build for expansion: Leave a planned utility route, accessible panel, and usable counter zone for a future appliance instead of filling the island on day one.
A smaller island near the back door may serve better than a larger structure at the far end of the yard. Shorter trips, reliable shade, and easier cleanup influence weekly use more than an appliance that stays covered for most of the year.
Designing an Island for Year-Round Multipurpose Use
An island built only around summer grilling can become seasonal clutter. The homeowner may love the first cookout, then avoid the space because the counter gets too hot, cushions have nowhere to go, and cleaning after a storm takes longer than preparing the meal.
Research from the International Casual Furnishings Association found that 77% of surveyed consumers wished they spent more time outside at home, while 42% identified cleaning and caring for outdoor furnishings as a major barrier. The findings are reported through. The practical lesson is straightforward: reduce the work required to use the space.
Build around more than cooking
Use the island as one zone within a larger outdoor room. Provide shaded prep space, task lighting that doesn't shine into people's eyes, and protected storage for cookware, serving pieces, cushions, and cleaning supplies. A dedicated waste area with a tight-fitting lid can reduce pests and keep food scraps away from seating.
Seating should support conversation without forcing guests into the cook's work path. Keep the serving side open enough for people to pull up, stand, and move through without crossing directly behind a hot grill. If the island sits beneath a roof, resolve smoke, grease, and heat before construction. An open-air grill may work without mechanical ventilation in some arrangements, while a covered pavilion can require a hood or an engineered clearance strategy based on the appliance and adopted code.
East Texas weather makes flexibility especially important. Shade helps during hot summer afternoons, while protected storage keeps rain from soaking the items you use every week. For storms, choose surfaces that shed water, secure loose furnishings, and place electrical equipment where splash and runoff won't create avoidable problems.
The same ICFA research found that 31% of professionals reported outdoor spaces becoming multipurpose areas for dining, offices, fitness, and wellness. That trend supports a simple design test: if the grill is cold, can the space still serve coffee, dinner, conversation, or quiet work?
Balancing Trends With Resale Value and Climate Flexibility
An outdoor kitchen can improve how a home functions, but no island guarantees a specific return at resale. In the KBB editorial coverage of outdoor-living trends, 98% of surveyed professionals said updated outdoor spaces affect home value. That is an expert perception, not a promise that every oversized island or specialty appliance will recover its cost.
A more durable approach puts broad usefulness ahead of personal showmanship. The same source reported that 67% of consumers prioritize practicality and durability over style, while 62% of experts identified drought-tolerant landscaping as the leading landscaping trend. Review the outdoor-living trend findings from KBB as directional context, then apply the ideas to your property rather than copying a magazine image.
Keep the layout adaptable
Choose repairable surfaces. Select countertop and cabinet systems with replaceable doors, accessible hardware, and finishes that can be renewed without dismantling the island.
Avoid appliance lock-in. A specialty pizza oven or imported feature may suit your household, but leave enough prep space and utility capacity for a future owner who prefers a different setup.
Use flexible utility planning. Place shutoffs and service access where a technician can reach them, and reserve a logical location for a refrigerator, lighting upgrade, or other future addition.
Manage runoff at the site level. Permeable hardscape, appropriate grading, and planting that tolerates local conditions can reduce standing water and maintenance around the island.
A modular or partially movable arrangement can make sense when you're unsure how the patio will evolve, when utility work is limited, or when resale flexibility matters more than a permanent masonry statement. A fixed island is appropriate when the location, drainage, shade, and utility routes are already sound. In both cases, durability should lead style.
Practical Next Steps for East Texas Homeowners
Start with a short project brief before requesting bids. Write down how often you expect to use the island, which appliances belong in the first phase, whether the area needs shade, and how much maintenance you're willing to perform. This prevents a beautiful rendering from suddenly becoming a project that doesn't fit your weekly routine.
Bring the brief to an on-site consultation in Tyler or your surrounding East Texas community. Ask the contractor to mark utility routes, drainage direction, appliance clearances, ventilation openings, access panels, and the locations of shutoffs. A design-build team can coordinate those decisions before construction instead of leaving separate trades to solve conflicts after the island is underway.
Use this checklist during the first meeting:
- Confirm the scope: Identify the island, patio or paving work, shade structure, lighting, seating, storage, and landscaping included in the estimate.
- Review weather exposure: Discuss summer heat, humidity, heavy rain, mud, insects, and winter storage before selecting finishes.
- Verify code questions: Ask who handles permits, inspections, gas testing, electrical protection, plumbing, and manufacturer clearances.
- Request product details: Confirm outdoor ratings, warranty terms, replacement hardware, maintenance requirements, and service access.
- Separate essentials from upgrades: Protect the budget for drainage, utilities, structure, and durable surfaces before adding specialty appliances.
- Get the agreement in writing: Request a detailed estimate covering installed products, workmanship support, schedule assumptions, and any financing options.
A useful consultation should leave you with more than a counter sketch. You should understand what will be built, how water and utilities will move, how the island will be serviced, and what the finished space will feel like during a hot afternoon or after a storm.
Here's a visual overview of the planning process to consider before construction begins:
Home Pro's Remodeling & Repairs provides design-build remodeling for outdoor living spaces, including outdoor kitchen planning, patios, utility coordination, and related exterior improvements across Tyler and nearby East Texas communities. Visit Home Pro's Remodeling & Repairs to request an on-site consultation, discuss your outdoor kitchen island plans, and receive a detailed path from design through construction.
Home Pro's Remodeling & Repairs, (903) 920-2969
Call (903) 920-2969More articles
7 Best Outdoor Kitchens: Designs, Costs, and Build Tips
Many outdoor kitchen problems begin on day one, when the layout, cover, and utility routes get decided before anyone looks closely at the budget.
Bathroom Vent Through Wall: Complete DIY Installation Guide
You've just stepped out of the shower on a humid East Texas morning.