Outdoor Kitchen Lighting: Safety, Design, and Setup Guide
A beautiful outdoor kitchen can still be difficult and unsafe to use after sunset.
October 6, 2026 · 11 min read
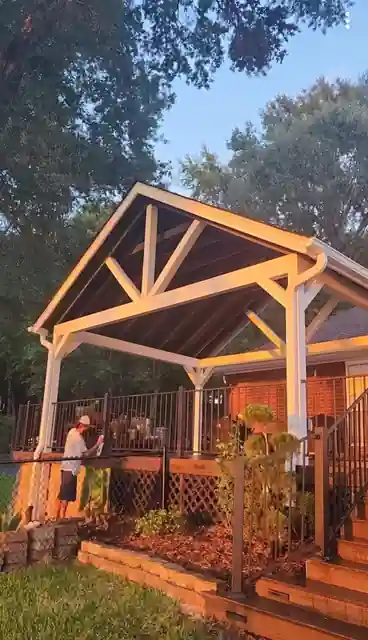
A beautiful outdoor kitchen can still be difficult and unsafe to use after sunset. The popular advice is to add warm string lights, a pendant, or a few decorative fixtures once the cabinets and countertops are finished. That approach treats light as scenery, even though outdoor cooking involves knives, hot surfaces, grease, water, fuel connections, and changing visibility.
Outdoor kitchen lighting should be planned as a task and safety system first, then softened for entertaining. The right design helps you see a grill control, identify a spill, prepare food without casting a body shadow, and walk around the island without glare. Decorative lighting has a place, but it shouldn't be responsible for every job.
Why Outdoor Kitchen Lighting Is More Than Ambiance
Lighting was the most commonly purchased product in outdoor upgrades at 29 percent, according to This Old House's outdoor living trends coverage. Yet many homeowners still leave illumination until the end, after the appliances, countertop overhangs, and cabinet faces have already determined where fixtures can go.
A single bright fixture rarely solves the problem. Mounted behind the cook, it can cast a large shadow across the grill or prep counter. Mounted too low or aimed toward seating, it creates glare. A fixture that looks attractive in a daytime photograph may shine directly into someone's eyes once the surrounding yard becomes dark.
Start with the work, not the fixture
Think about what people do in each part of the kitchen. The grill needs readable controls and even illumination across the cooking surface. The prep counter needs light where hands, knives, ingredients, and spills meet. A sink needs enough visibility for rinsing and cleanup, while steps and pathways need low, continuous guidance rather than intense brightness.
This is why a layered plan works better than a floodlight. Task lighting serves a specific activity. Ambient lighting gives the space a comfortable overall glow. Accent lighting highlights stone, cabinetry, planting, or architectural details. Each layer should have a job, and the task layer should remain usable even if decorative or smart features are switched off.
Practical rule: If the cook has to use a phone flashlight to read a control or inspect food, the system has failed, regardless of how attractive the space looks.
Plan fixture locations while developing the kitchen layout, not after the masonry is complete. A useful starting point is outdoor kitchen planning and design, where appliance placement, seating, pathways, and lighting can be considered as one coordinated arrangement. Shielded luminaires, concealed under-cabinet modules, and carefully aimed side lighting usually produce more usable visibility than one oversized overhead fitting.
Layered Task Lighting Zones for Outdoor Kitchens
A practical lighting plan divides the kitchen into zones. Each zone has a different visual demand, so it shouldn't receive the same output or control setting.
Cooking and preparation zones
The Department of Energy's residential lighting guidance, based on IES recommendations, identifies roughly 50 footcandles, about 538 lux, at food-preparation counters, 30 footcandles, about 323 lux, at cooktops and sinks, and 5 footcandles, about 54 lux, for general floor illumination. These are design targets, not a reason to make every fixture equally bright. Preparation and cooking demand more light because users must distinguish food, surfaces, controls, and hazards at close range.
For the grill, place light to the side or above the work surface when possible. A source directly behind the cook turns the cook's body into a moving screen. Under-cabinet strips, short linear modules, or fixtures integrated into a hood or canopy can distribute light across the grate and nearby landing area.
The prep counter deserves its own circuit or control zone. Several evenly spaced modules often outperform one high-output strip because they reduce dark patches created by the user's arms and torso. Shield the diode or lamp from normal eye level, particularly where the counter faces a dining area.
Sink, dining, and circulation zones
Sinks and cleanup counters need practical illumination, but dining areas generally benefit from a lower, warmer setting. Pathways, steps, and the toe-kick beneath an island should guide movement without competing with the cooking surface.
A simple zoning arrangement might include:
- Prep control: Bright, shielded light at cutting and plating surfaces.
- Cooking control: Separate illumination for the grill, burners, fuel connections, and appliance controls.
- Dining control: Dimmable ambient fixtures that can remain comfortable during conversation.
- Circulation control: Low-level light for steps, edges, and routes around the island.
Measure light at the actual cutting surface, grill controls, sink basin, and walking route after installation. A high-lumen fixture mounted behind the user can produce worse visibility than a modest fixture aimed correctly. Dimming and separate switches let the kitchen move from active preparation to evening ambience without leaving every zone at its highest setting.
The Department of Energy lighting strategy guideline provides the referenced illumination targets for this approach.
The sequence below shows how layered lighting works in practice.
Fire, Injury Risk, and Why Visibility Matters
Outdoor kitchen lighting can't prevent every grilling incident, but poor visibility makes routine risk management harder. Users need to see grease buildup, spilled liquid, burner controls, fuel connections, hot surfaces, and the edge of a step. Those details disappear quickly when the only source is a decorative fixture aimed at the patio.
From 2020 through 2024, U.S. fire departments responded to an annual average of 12,141 home fires involving grills, hibachis, or barbecues, and gas grills accounted for about three-quarters of those fires, according to the National Fire Protection Association's grilling safety data. The figures don't mean lighting is the sole control. They show why a cooking area deserves the same deliberate attention given to other working areas around the home.
Visibility supports safer routines
A well-lit grill station helps the operator:
- Read controls: Labels and settings should be visible without leaning over a hot surface.
- Inspect the cooking area: Dark corners can conceal grease, residue, or food that has fallen below the grate.
- Notice spills: Water, oil, and dropped ingredients can create slip hazards around the grill and sink.
- Follow fuel connections: Connections and shutoff points should remain accessible and visible.
- Identify nearby combustibles: Curtains, cushions, stored materials, and wall surfaces shouldn't disappear into shadow.
Lighting also matters beyond the counter. About one-quarter of grill structure fires in the NFPA data began on an exterior balcony or open porch, locations that can overlap with patio kitchens. Clear illumination around the grill perimeter, adjacent structures, and routes away from the cooking area helps users notice conditions that need attention before they become urgent.
Cleaning and lighting work together
The same NFPA information identifies uncleaned grills in 20 percent of grilling fires. Light doesn't replace cleaning, inspection, clearance, or responsible fuel handling. It makes those tasks easier to perform consistently by revealing residue and buildup that a dim space hides.
Avoid placing a fixture where heat, smoke, or grease will quickly soil its lens, but don't hide necessary task lighting so thoroughly that it can't be serviced. Use shielding to control glare, keep fixtures clear of hot components, and make sure the operator can see without staring into the light source. A safe design gives the cook useful contrast, not a white glare that washes out the countertop.
Wet-Location Fixtures and Electrical Safety Basics
Electrical infrastructure deserves attention before fixture style. Outdoor kitchens combine moisture, conductive metal, plumbing, appliances, exposed connections, and changing temperatures. Stainless-steel surfaces and wet hands can make a fault more dangerous, so the installation must be designed for the actual exposure rather than treated as an indoor kitchen with a roof.
Match the rating to the exposure
A damp-location product may be suitable where moisture is limited and controlled. A wet-location product is designed for areas where rain, spray, or direct water exposure can reach the fixture. Outdoor kitchen lighting near an open counter, sink, grill, or storm-exposed wall often needs equipment listed for wet conditions.
Choose outdoor-suitable wiring methods, boxes, connectors, switches, and cable protection. Corrosion-resistant hardware and sealed connections help preserve the system, but they don't excuse poor placement. Keep power supplies and junction points accessible for service while protecting them from direct spray, standing water, cooking heat, and grease.
The Eaton 2023 NEC pocket guide states that the 2023 NEC generally requires GFCI protection for dwelling-unit outdoor receptacles supplied by single-phase branch circuits rated 150 volts or less to ground and 50 amperes or less. It also addresses GFCI coverage for dwelling-unit kitchen receptacles.
Treat low voltage as a system
Low-voltage lighting can reduce shock exposure in some applications, but it still depends on an upstream power source and a properly listed transformer or power supply. If that transformer plugs into an outdoor receptacle, the receptacle and its cover still need to meet applicable protection requirements.
Mount the transformer in a dry, ventilated, serviceable location. Don't bury it behind finished cabinetry or place it where rainwater can collect. Receptacles should stay out of splash zones, and weatherproof covers should remain protective while plugs are inserted where the applicable code requires that function.
Electrical decision: Have a qualified electrician verify the locally adopted NEC and Tyler-area inspection requirements before circuits, transformers, and appliance connections are finalized.
Lighting may share infrastructure with other outdoor equipment only when the circuit design, load, protection, switching, and local requirements support it. A refrigerator, ice maker, grill ignition system, and lighting controls shouldn't be combined casually. A planned circuit layout is easier to inspect and maintain than extension cords or improvised power supplies hidden behind a finished island.
LED, Low-Voltage, Solar, and Smart Controls Compared
For most outdoor kitchen lighting, LED is the practical baseline. The U.S. Department of Energy reported that, by 2018, LEDs represented 51.4 percent of installed outdoor lighting, compared with 29.8 percent of indoor lighting. The Department of Energy's LED adoption report supports the conclusion that exterior applications adopted the technology quickly, making LED the sensible starting point for task, pathway, accent, and overhead fixtures.
The decision is less about choosing one technology for the entire yard and more about matching each option to the job.
A wired LED system usually gives the most predictable task performance. Low-voltage runs can simplify certain outdoor-style installations, but the transformer and connection points remain part of the electrical system. Solar fixtures are convenient where trenching is impractical, yet they aren't a dependable sole source for a grill or prep counter.
Smart features should support, not control, essential visibility. Motion sensors can switch off while a stationary cook is working. Wi-Fi interruptions can disable app-based commands. Color-changing modes can introduce glare or distract from the work surface. Provide a physical switch or manual override for cooking zones.
For broader property planning, homeowners may also find it useful to transform your yard with landscape lighting, particularly when pathway and surrounding outdoor illumination need to work with the kitchen rather than compete with it.
Planning and Installing Outdoor Kitchen Lighting Step by Step
Lighting decisions are easiest to correct before the countertop is installed. Once stone, cabinets, siding, and appliances are fixed in place, a retrofit may force visible conduit, awkward fixture locations, or light sources positioned behind the person doing the work.
Build the plan around use
Start by marking the grill, prep counter, sink, dining seats, steps, and routes around the island. Note where the cook stands, where guests sit, and which surfaces can reflect light into someone's eyes. This drawing should show fixture locations, switches, dimming zones, transformer access, receptacles, and likely service paths.
Then select fixtures based on exposure and placement. Under-cabinet modules need shielding and a construction detail that hides the source from normal sightlines. Grill fixtures need distance from heat and grease. Path and toe-kick lighting should guide feet without creating a bright band at eye level.
A reliable installation sequence is:
- Confirm the zones: Mark task surfaces and circulation routes on the final kitchen plan.
- Set illumination targets: Use the referenced prep, cooking, sink, and floor targets as design checks.
- Coordinate infrastructure: Route wiring, boxes, controls, and transformer access before finishes close.
- Install rated equipment: Match every component to damp or wet exposure and protect connections.
- Add manual controls: Separate cooking, prep, dining, and circulation functions.
- Test at dusk: Look for body shadows, reflected glare, dark steps, and unexpected shutoffs.
- Verify service access: Make sure lenses, drivers, transformers, and junctions can be inspected without dismantling the kitchen.
For broader layout and finish decisions, luxe outdoor kitchen design tips can complement the lighting plan. Budget-conscious remodelers can also review how to build an outdoor kitchen on a budget before choosing which infrastructure to install during the first phase.
Don't judge the system only from the dining chair. Stand at the grill, hold a knife over the prep surface, read the appliance controls, and walk the route with the ambient layer dimmed. Those checks reveal whether the design works for the person cooking, not just the person viewing the finished project.
Outdoor Kitchen Lighting for East Texas Homes
An East Texas outdoor kitchen has to handle humidity, storms, insects, and long summer evenings when the space may be used repeatedly. Sealed, exposure-rated fixtures and protected connections matter more than a decorative fitting that looks good on a showroom wall.
Consider a Tyler-area kitchen with a covered grill, a sink beside the prep counter, and seating several steps away. The practical solution would give the grill and counter their own shielded task zones, keep pathway lighting low enough for comfortable dining, and retain a manual switch if a sensor or app fails during cooking. The transformer and receptacles would remain accessible, protected, and coordinated with the appliance layout.
Lighting shouldn't be added independently from the rest of the build. A review of how much an outdoor kitchen costs can help homeowners decide which wiring, controls, and fixture locations belong in the initial scope rather than becoming a difficult retrofit. For circuits and wet-location equipment, use a qualified electrician familiar with locally adopted requirements.
Prioritize clear task visibility, controlled glare, correct ratings, dependable controls, and maintainable installation. Decorative warmth comes after those conditions are met.
Home Pro's Remodeling & Repairs offers design-build remodeling, outdoor kitchen planning, exterior improvements, and coordinated construction support for homeowners across Tyler and East Texas. Visit Home Pro's Remodeling & Repairs to request an onsite consultation and discuss an outdoor kitchen lighting plan that fits your layout, electrical needs, and budget.
Home Pro's Remodeling & Repairs, (903) 920-2969
Call (903) 920-2969More articles
7 Best Outdoor Kitchens: Designs, Costs, and Build Tips
Many outdoor kitchen problems begin on day one, when the layout, cover, and utility routes get decided before anyone looks closely at the budget.
Bathroom Vent Through Wall: Complete DIY Installation Guide
You've just stepped out of the shower on a humid East Texas morning.