Remodeling Estimate Checklist: 8 Items to Verify
A reliable remodeling estimate should let you verify exactly what will be built, what is not included, how choices affect price, when work will happen, and how unexpected costs will be handled.
September 21, 2026 · 20 min read
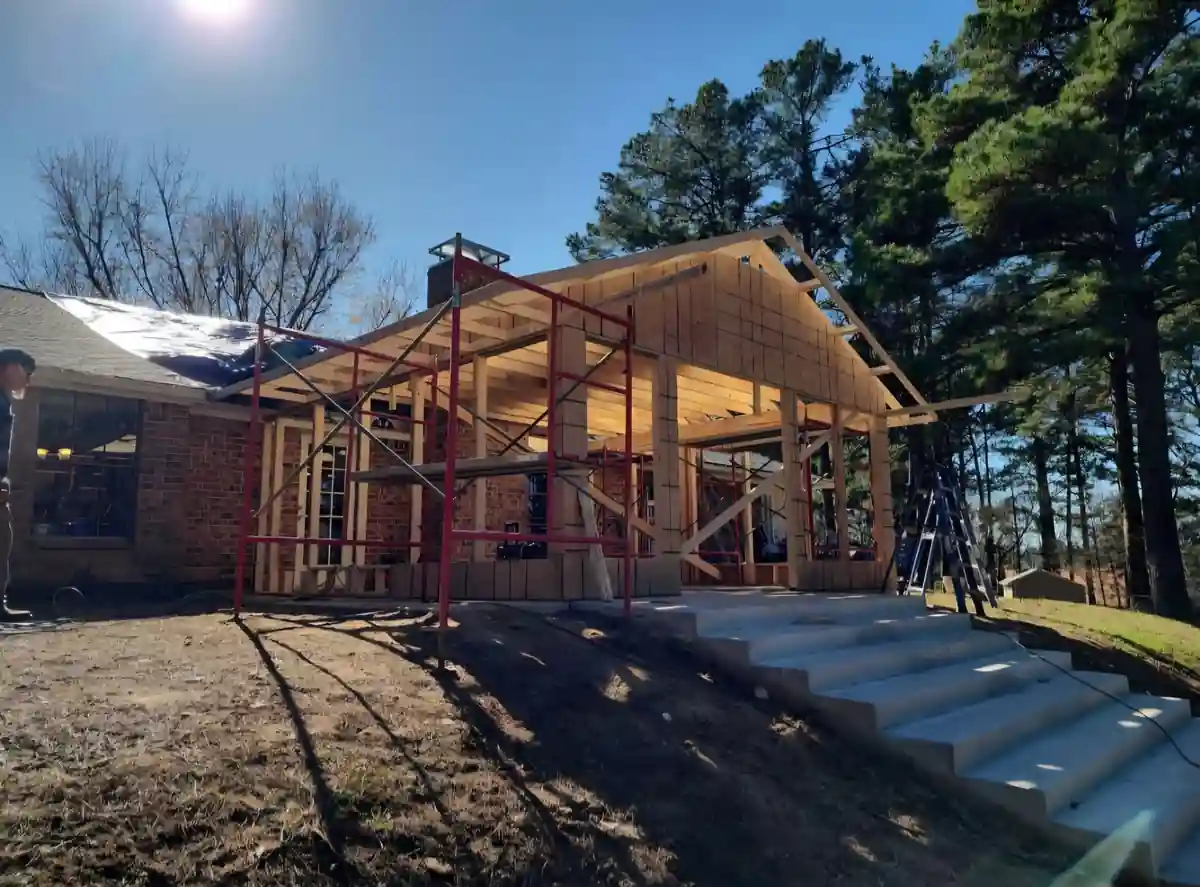
A reliable remodeling estimate should let you verify exactly what will be built, what is not included, how choices affect price, when work will happen, and how unexpected costs will be handled. That matters more now because U.S. home remodeling spending climbed 51% from $404 billion in 2019 to $609 billion in 2023, which means more money is moving through larger, more complex renovation projects.
Before you compare the total, compare the control points. The lowest number on page one often hides the most risk on page three.
A safe estimate reads like a project map, not a sales sheet. You should be able to review it in order: promised work, materials and labor, permits and site assumptions, then timing, contingency handling, payment expectations, and warranty support. If any of those sections are vague, the estimate is incomplete even if the price looks attractive.
That's especially true in major metros. Harvard reports that the 25 major metros tracked in the 2015 American Housing Survey accounted for almost $100 billion in owner home-improvement spending, or about 45% of the national total, and that in the 35 largest metros, improvement activity generated 54% of total U.S. remodeling activity over the prior decade, which reinforces how much planning pressure sits in dense, high-cost markets.
The best estimates act as control documents from the first walkthrough to the final punch list. A structured design-build process, including target-budget alignment and pre-construction planning like Home Pro uses, can help keep scope, cost, and expectations tied together before demolition starts.
1. Detailed Scope of Work Definition
If the scope is fuzzy, every other line item becomes suspect. Homeowners usually focus on finishes first, but the written scope is what controls arguments, delays, and change orders.
A strong scope says what gets removed, what gets built back, what stays in place, and what standards apply. In a kitchen, that means more than “replace cabinets and counters.” It should identify cabinet style, door profile, interior accessories, countertop material and edge, backsplash coverage, appliance model responsibility, sink location, lighting changes, outlet relocations, paint areas, and trim repair.
What to verify in writing
A bathroom estimate should tell you tile size and pattern, grout type, waterproofing method, fixture brands, fan replacement details, and whether the shower pan is custom or pre-formed. A roof replacement estimate should spell out underlayment, flashing treatment, drip edge, ventilation work, deck-repair assumptions, cleanup, and disposal.
Use this quick test:
- Match drawings to words: If plans exist, the estimate should reference the exact drawing pages and revision dates.
- Name the finish level: “Builder-grade vanity” is weak. “White shaker vanity with soft-close drawers” is usable.
- Clarify what stays: Existing flooring, existing windows, and reusable appliances should be listed if they're staying.
- Require revision control: Every approved scope change should create an updated document, not a verbal promise.
Practical rule: If two contractors could read the same scope and build materially different projects, the scope isn't finished.
Most scope problems start small. A missing note about moving a vent hood, extending tile to the ceiling, or repairing drywall outside the work area can become a serious cost dispute. Homeowners who want fewer surprises should insist on a scope that closes those gaps early. If you've dealt with projects that keep expanding as work begins, this guide on preventing scope creep during remodeling is worth reading before you approve the estimate.
2. Material Specifications, Pricing, Design Selections, and Allowances
Material lines do more than describe finishes. They control budget drift, purchasing deadlines, delivery risk, inspection timing, and the quality you live with after the job is done.
A weak estimate says “owner to select tile” and moves on. A useful estimate ties that tile decision to square footage, pattern, trim pieces, waterproofing compatibility, lead time, and the date the selection must be finalized to keep the schedule intact. That is the difference between a price sheet and a project-control document.
Start by scanning for anything vague. Product names matter because they prevent quiet downgrades and pricing surprises later. “Quartz countertop, 3 cm, eased edge, included sink cutout” gives you something to verify. “Countertop allowance” leaves too much open.
Here is where homeowners get caught. A contractor can carry a low allowance and still show a competitive total, even if the amount will not buy the finish level shown in the design conversation. I see this often with lighting, plumbing fixtures, tile, appliances, and door hardware.
Use a three-part test on every allowance:
1. Is the allowance realistic for your taste level? If you expect large-format porcelain tile and the estimate carries a bargain-basement number, the total is understated.
2. Does it include the full material package? Tile often needs bullnose or metal edge trim, underlayment, grout, sealer, movement-joint materials, and extra waste for cuts. Fixtures may need valves, trim kits, mounting parts, and finish-specific accessories.
3. What happens if the actual cost changes? The estimate should state whether overages are billed at cost, cost plus markup, or through a formal change order.
A good estimate also separates selected items from undecided items. That split helps you manage the project instead of reacting to it. Locked selections support purchasing and scheduling. Allowances mark open decisions and the risk attached to them.
Quoted plainly: “If the allowance is carrying the design, the budget is still soft.”
That matters because material decisions affect more than appearance. Custom windows can hold up framing close-in. Specialty plumbing trim can delay final inspection. A backordered range can stall countertop templating if dimensions are not confirmed. On paper, these look like finish choices. In the field, they are schedule controls.
Review the estimate with these homeowner checks in mind:
- Look for exact product identification where available: Brand, model, size, finish, grade, and color should appear for fixtures, flooring, windows, roofing, cabinets, and appliances.
- Check unit assumptions: Square footage, linear footage, box counts, waste percentages, and room locations should make sense.
- Confirm who is buying what: Contractor-purchased and owner-purchased items should be separated clearly, with responsibility for delivery, storage, damage, and warranty spelled out.
- Ask for selection deadlines: The estimate should show when each unresolved item must be chosen to avoid delays.
- Require substitution terms in writing: If a product is discontinued or delayed, the approval path, credit method, and schedule impact should already be defined.
One practical example. If a bathroom estimate includes a tub filler allowance but does not mention the rough-in valve, mounting location, or access requirements, the allowance is incomplete. If a kitchen estimate includes cabinet pricing but says nothing about fillers, panels, crown, under-cabinet lighting coordination, or hardware installation, the cabinetry number may not reflect the actual build.
A short walkthrough of material planning can help you see how early selection decisions affect the estimate:
Good material language reduces disputes because it connects design choices to purchasing, approvals, scheduling, and closeout support. If a line item cannot tell you what is being installed, what it should cost, and what project risk it carries, it needs revision before you sign.
3. Labor Hours and Crew Composition
Labor lines do more than explain cost. They show who will control the job, when key trades can enter, and where schedule risk is hiding.
A single labor total leaves too much unanswered. Homeowners cannot tell whether the estimate includes a working foreman, qualified subcontractors, helpers, punch work, or just the core installation hours. That matters because labor drives production speed, inspection readiness, site protection, and the quality of the finish work you live with after the crew leaves.
Start by reading labor as a staffing plan, not a price bucket. If the estimate says "bathroom remodel labor" for one lump sum, ask for the crew behind that number. A solid answer names the roles, the trade handoffs, and the phase each person touches.
For example, a bathroom project may need demolition labor first, then framing corrections, then qualified plumbing and electrical rough-in, then waterproofing and tile, then trim-out and punch work. If those steps are compressed into one line, you cannot tell whether the contractor has accounted for sequencing or is assuming the field will sort it out later.
One contractor software survey found many firms still build estimates in spreadsheets, which helps explain why labor detail often gets simplified during revisions or copied forward from older jobs.
Read the crew plan before you read the total
The practical question is simple: who is on site, and when?
A kitchen remodel with custom cabinets might look fine on price but still be underbuilt on labor. Cabinet setting can be priced correctly while the estimate misses appliance panel fitting, filler scribing, final adjustments after countertop install, touch-up paint, and punch corrections once lighting and hardware are in place. Those are not minor details. They are the hours that decide whether the room closes out cleanly or drags through change orders and callbacks.
Ask for these details in plain language:
- Trade breakdown by phase: Demolition, framing, rough-in, setting, finish, and cleanup should point to the trade responsible for each step.
- Crew composition: Who is a lead, who is a helper, and which work is done by qualified trade partners or subcontractors.
- Supervision time: Someone needs to handle field decisions, inspections, sequencing, and quality control.
- Support labor: Protection, material handling, dust control, daily cleanup, and haul-off labor should appear somewhere in the estimate.
- Return visits: Final electrical trim, plumbing trim, punch work, and adjustment visits often happen after other work is complete.
Here is the trade-off contractors deal with every week. Larger crews can shorten the calendar, but they also raise coordination pressure and can create congestion in tight spaces. Smaller crews may cost less per day in overhead, but the job can stretch if one delayed trade holds up everyone behind them. A useful estimate makes that trade-off visible instead of burying it.
If the labor section cannot show who owns each phase, the estimate is weak as a control document.
One more check catches a lot of trouble. Compare the labor lines to the scope and timeline. If the estimate includes detailed finish work but very little finish labor, ask why. If multiple trades appear to be working in the same room at the same time, ask how access will be managed. The goal is not to audit every hour. The goal is to confirm that the estimate reflects a buildable plan.
4. Equipment, Tools, and Permits
A good estimate shows how the job will physically run, not just what the contractor plans to build.
Equipment and permit lines are where that becomes visible. They tell you whether the team has planned for access, protection, cleanup, inspections, and downtime. If those items are vague, the schedule is usually vague too.
A roof replacement needs one set of controls. An interior remodel needs another. On a roof job, I want to see tear-off disposal, magnetic nail sweep, landscaping protection, and any scaffold or lift rental called out clearly. On an interior project, the pressure points are different: floor protection, plastic containment, dust control, debris staging, haul-off frequency, and sometimes temporary power, water, or sanitation.
Those details affect more than cost. They affect how disruptive the project will be inside your home and how many stop-and-start days the crew may face.
Here is a practical way to read this part of the estimate:
If the project needs a dumpster, ask where it will sit, how long it stays, and whether permit fees for street placement are included. If a scaffold or lift appears, ask how many days are assumed. If protection is listed as a lump sum, ask what it covers. Hardwood protection, countertop protection, daily zipper-wall setup, and final debris removal are different tasks with different labor and material needs.
Permits deserve the same level of scrutiny. The estimate should identify which permits apply, who is responsible for pulling them, and what happens if review comments or reinspections delay progress. That is not paperwork trivia. It is schedule control.
Some permits are pulled by the general contractor. Some are pulled by qualified trade partners. In a few jurisdictions, a homeowner can pull certain permits, but that shifts responsibility in ways many owners do not expect. Before comparing bids, it helps to review whether you need a permit for a kitchen remodel so the permit scope is not left to assumption.
A useful estimate answers these questions somewhere on the page, even if it does not use a checklist format:
- What temporary protections are included for floors, adjacent rooms, driveways, landscaping, and finished surfaces?
- What equipment is assumed, such as dumpsters, scaffolds, lifts, saw setups, negative-air machines, or temporary toilets?
- Are permit fees included as allowances, fixed amounts, or pass-through costs?
- Who handles inspection scheduling and access?
- What cost, if any, is assigned to reinspection trips or remobilization after a delay?
If equipment and permit lines are missing, the estimate is missing part of the build plan.
One last homeowner check is simple. Compare this section against the scope and timeline. A whole-home interior remodel with no dust control, no debris plan, and no permit breakdown usually means those costs are hidden elsewhere or have not been planned carefully at all.
5. Contingency and Allowance Budget
A remodeling estimate without a contingency plan is missing part of the control system.
This section should tell you two things before work starts. What price is still variable, and what process governs changes when the house reveals something no one could see during the walk-through.
The biggest mistake is blending allowances and contingency into one fuzzy cushion. That makes the estimate look simpler, but it weakens decision-making during the job. Selections, hidden damage, code corrections, and design revisions do not belong in the same bucket because they affect cost and approvals in different ways.
Two budget lines, two different jobs
Allowances cover items you have not selected yet. Tile, plumbing fixtures, appliance packages, decorative lighting, and finish hardware usually land here. If the allowance for a faucet is $350 and you choose one that costs $700, the budget change is easy to trace.
Contingency covers conditions that are unknown at estimate stage. Open a wall in an older home and the crew may find rot at a window, ungrounded wiring, an undersized header, or plumbing that fails current code. Those issues change scope. They also change sequencing, inspections, and sometimes who needs to return to the site.
As noted in remodeling estimate template guidance on exclusions and hidden costs, overlooked items such as mold or asbestos remediation, engineering input, and architectural work can push costs well beyond the headline number if they are not addressed clearly up front.
Good estimates assign uncertainty to a category, a review process, and a decision point.
A useful homeowner check is simple. Ask the contractor to label each line as one of three types: fixed price, allowance, or contingency-related change. That one step makes later conversations cleaner because everyone is working from the same budget map.
What to require in writing
Instead of asking, “Do you carry contingency?”, ask these job-control questions:
- What conditions would trigger contingency use?
- Who documents the issue with photos, notes, or trade input?
- Who approves the added work before it starts?
- How are allowance overages or credits shown on payment draws?
- What happens to unused contingency or unused allowance funds at closeout?
That last point matters. A reserve is not a contractor slush fund. The estimate or contract should state whether unused amounts remain with the owner, convert to credits, or stay untouched unless approved for a specific change.
One practical rule I recommend is a photo, scope, and price approval step before contingency dollars are spent, except for emergency stabilization. It slows down emotional decisions and keeps the project record clean.
6. Project Timeline and Scheduling
A weak schedule causes change orders, idle days, rushed decisions, and trade stacking. In an estimate, the timeline should work as a control document that shows how scope turns into labor flow, inspections, deliveries, and homeowner decisions.
Start by looking for sequence, not just duration. “Six weeks” means very little by itself. A useful estimate shows what has to happen first, what can overlap, and what will stop the next phase from starting.
For example, cabinet installation is not just a calendar event. It depends on layout confirmation, wall prep, floor height decisions, delivery, and enough completed rough work to keep the boxes from being removed later for corrections. Countertops add another handoff because templating cannot happen until base cabinets are set and verified. One vague line for “kitchen remodel, 6 to 8 weeks” hides all of that risk.
Read the schedule like a handoff map
The most reliable estimates break the job into milestones with dependencies attached. That lets a homeowner test whether the price, crew plan, and finish date fit together.
Ask the contractor to identify these four schedule controls in writing:
- Start conditions. Permit approval, signed selections, deposit, long-lead orders, and site access.
- Stop points. Inspections, template approval, specialty deliveries, utility shutdowns, and owner signoffs.
- Owner deadlines. Dates for fixture, tile, hardware, paint, and appliance decisions.
- Recovery plan. What happens if a delivery slips, an inspection fails, or hidden damage changes the sequence.
That last item matters more than many homeowners expect. A good estimate does not promise that nothing will move. It states how the job will be resequenced, who updates the calendar, and whether delay costs hit the budget.
Compare two schedules, not two finish dates
One contractor may show a faster completion date because the estimate leaves out review time, inspection lag, punch work, or material lead times. Another may look slower on paper because the schedule includes realistic buffers and clear decision deadlines.
The second estimate is often the safer buy.
Large additions make this easier to spot because the phases are longer and more visible. This guide on how long a home addition takes by phase gives a useful reference point before you compare contractor schedules.
What a homeowner should pin down before signing
Instead of asking only, “How long will it take?”, ask for the operating rules behind the dates:
- Milestone dates: demo, rough-in completion, inspections, installation phases, punch, and closeout
- Lead-time items: cabinets, windows, custom glass, specialty fixtures, stone fabrication, and appliances
- Work-hour assumptions: weekday crew hours, weekend work, and any limits from HOA rules or local noise ordinances
- Access constraints: whether you need a usable kitchen, bathroom, driveway, or entry during construction
- Schedule update process: who sends revisions, how often updates go out, and how approved changes affect completion
A practical schedule gives you decision points, not just target dates. That is what turns an estimate from a price sheet into a job-management tool.
7. Warranty, Guarantees, and Service Support
A remodeling estimate should show how the job gets closed out, serviced, and corrected after completion. If that information is thin, the estimate is missing part of the project plan.
Warranty terms are not just legal language. They control who owns the next problem, how fast it gets addressed, and whether small defects turn into drawn-out arguments. That makes this section part of job control, not an afterthought.
Here is the practical split homeowners need to see clearly.
A manufacturer may cover the product. The contractor may cover the installation. Those are different obligations, with different claim paths, time limits, and exclusions.
If a faucet cartridge fails, the brand may replace the part. If the faucet was installed out of level and starts leaking at the connections, that usually falls under workmanship. If a cabinet door settles after installation, the estimate should tell you whether adjustment is included during the service period or billed as a return visit.
Read the service process like an operating procedure
Strong warranty language explains what you do if something goes wrong. It should name the service contact, how to submit a claim, what photos or documents are needed, and how urgent issues are handled.
It should also define the handoff at closeout. Homeowners should know what paperwork they will receive, who keeps product registrations, and whether the contractor helps with manufacturer claims or leaves that to the owner.
"A warranty is only as good as the service path behind it."
One estimate may promise a one-year warranty and say little else. Another may spell out response windows, seasonal touch-up rules, manufacturer coordination, and closeout documents. The second estimate gives you more control, even if the top-line price is higher.
Use this section to pin down five decisions before signing:
- Covered work: Identify which installed items are backed by labor warranty, including trim, tile, paint touch-up, doors, hardware, and fixture setting.
- Service method: Confirm who receives requests, what counts as warranty work, and whether emergency issues get a different response path.
- Manufacturer coordination: Ask whether the contractor handles product claim paperwork or whether you will be calling vendors yourself.
- Owner maintenance duties: Check for care requirements that affect coverage, such as recaulk intervals, filter changes, sealing, or humidity control.
- Closeout package: Require warranty papers, product data, care instructions, paint colors, attic stock, and final sign-off items in one handoff.
Weak estimates get exposed here. Vague language sounds fine until a shower door needs adjustment, a floor board moves, or a finish starts failing months after completion.
For homeowners in East Texas, an insured contractor with an active service process can reduce friction after the job is done. The estimate should show that support in plain terms from day one.
8. Site Conditions, Assumptions, and Exclusions
Bad assumptions are where a clean estimate turns into a messy job.
This part of the estimate controls what happens when the walls open, the floor comes up, or the crew finds something no one could confirm at the first walk-through. Read it as a jobsite risk log, not fine print. If the contractor assumed access, reuse, or sound existing structure, that should be written plainly before you sign.
A strong estimate names the field conditions it is pricing around. In an older kitchen, that might mean existing supply and drain lines stay in place unless hidden damage or code issues require changes. In a bathroom, it may assume the subfloor outside the wet area is sound. On an exterior job, it may assume normal staging access, legal parking nearby, and no concealed rot beyond visible trim failure.
Local conditions shift these calls fast. Analysts at the Harvard Joint Center for Housing Studies have documented wide regional differences in home improvement spending and activity, which tracks with what contractors see on the ground: labor rates, permit review, inspection expectations, disposal rules, and repair standards are not uniform from one market to another (Harvard Joint Center for Housing Studies home improvement research).
That is why exclusions matter. They separate priced work from possible work.
Use this section to mark up the estimate before approval:
- Flag visible risk items: Ask the contractor to note active leaks, staining, movement cracks, soft flooring, outdated wiring, limited crawlspace clearance, or insect damage seen during the visit.
- Confirm hidden-condition assumptions: If the price assumes reusable framing, level enough substrate, adequate electrical capacity, or no asbestos or lead handling, those assumptions should be spelled out.
- List excluded work by name: Common exclusions include engineering, hazardous material testing or abatement, utility company fees, off-site storage, landscaping repair, and finish work outside the remodel area.
- Pin down access conditions: Occupied-home restrictions, pet control, parking limits, elevator reservations, attic or crawlspace entry, and material staging all affect labor time and sequencing.
- Decide the change-order trigger: Require a written threshold for how concealed damage, code corrections, or owner-requested additions get priced and approved.
One line can change the job: “Price assumes existing panel has capacity for added circuits.” If that assumption fails after demolition, the schedule, permit path, and electrical scope all change with it. The estimate should show that chain reaction early, so you can budget for it or ask for an alternate price.
Clear exclusions do not weaken an estimate. They make it usable. A higher bid with honest assumptions usually gives a homeowner more control than a low bid that stays vague until demolition exposes the scope.
8-Point Remodeling Estimate Checklist Comparison
Turn the Estimate Into a Decision Tool
A remodeling estimate checklist works best when you use it line by line, not total by total. Headline price matters, but it should be the last thing you compare, not the first.
Start with the promised work. Confirm that the scope describes what will be removed, what will be built, which drawings or selections control, and which finishes are included. Then review material specifications and allowances so you can see whether the estimate is based on real products or numbers.
Next, check labor responsibility. You want to know which trades are involved, how the work is sequenced, and who manages day-to-day coordination. After that, review equipment, site logistics, permits, inspection assumptions, and any start-date risks tied to approvals or delivery timing.
Contingency rules deserve special attention. Hidden conditions are part of remodeling. The better question isn't whether surprises can happen. It's whether the estimate shows how those surprises will be documented, priced, approved, and closed out. A written contingency process is often the difference between a controlled project and a reactive one.
Then review the timeline as if it were a budget document, because in practice it is. Material lead times, owner selection deadlines, inspection waits, and room access constraints all affect labor use and project cost. Make sure the estimate and the contract support each other on payment timing too. Final payment schedule verification should be a last cross-check, not an afterthought.
The last pass should focus on assumptions, exclusions, and post-completion support. If something is unclear, ask for a written clarification before signing. Keep approved revisions, selection confirmations, and allowance updates in one place. If unknown conditions still exist, use the on-site consultation to narrow them before work starts rather than arguing over them later.
For East Texas homeowners, Home Pro's Remodeling & Repairs is one example of the kind of structured process worth looking for: insured design-build service, free onsite estimates, target-budget planning, defined pre-construction communication, and service support after installation. That doesn't replace contract review, permit review, or due diligence. It does show what organized estimate communication should look like.
A strong estimate doesn't just tell you what a remodel costs. It tells you how the project will be controlled.
Home Pro's Remodeling & Repairs helps East Texas homeowners turn a rough idea into a written scope, realistic estimate, and buildable schedule before construction starts. If you want an estimate that covers scope, selections, permits, assumptions, and support in one place, visit Home Pro's Remodeling & Repairs to schedule a free onsite estimate.
Home Pro's Remodeling & Repairs, (903) 920-2969
Call (903) 920-2969More articles
7 Best Outdoor Kitchens: Designs, Costs, and Build Tips
Many outdoor kitchen problems begin on day one, when the layout, cover, and utility routes get decided before anyone looks closely at the budget.
Bathroom Vent Through Wall: Complete DIY Installation Guide
You've just stepped out of the shower on a humid East Texas morning.