Siding Window Replacement: A Practical Guide for Homeowners
You notice the stain first.
October 9, 2026 · 12 min read
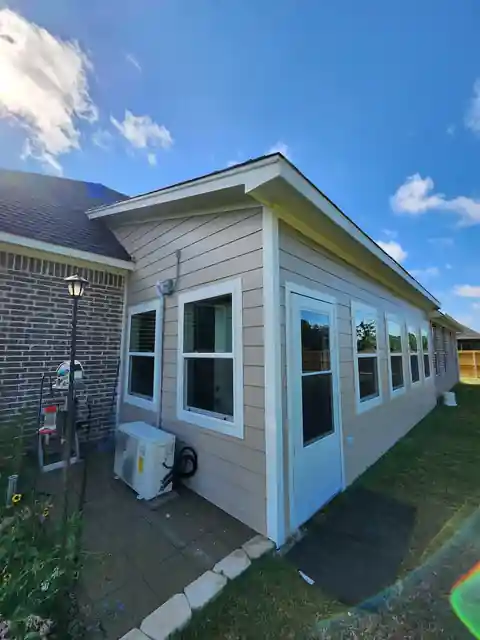
You notice the stain first. It may be a soft corner beneath a bedroom window, a draft that makes one room uncomfortable, or siding loosened after a hard East Texas storm. Then a contractor suggests replacing both the siding and windows, and the project suddenly sounds like two separate upgrades with two separate scopes.
On the wall, they aren't separate. The window opening, flashing, water-resistive barrier, trim, and siding form one drainage system. If one trade installs a new window without connecting it to the wall's drainage plane, or another installs siding tight against flashing, water can move behind the cladding even when the finished exterior looks sealed.
Why the Siding and Window Joint Is the Wall's Hardest Job
The joint around a window is where several materials meet, move, and shed water in different ways. A window frame needs a stable, square opening. Siding needs clearance, fastening space, and a route for incidental moisture to drain. Housewrap or building paper has to overlap flashing in the correct direction. Trim has to cover the assembly without blocking drainage.
East Texas adds demanding conditions. Strong summer heat drives solar gain through exposed glass, while storms can push wind-driven rain against siding, corners, and window trim. Humidity swings make wood, fiber cement, sealants, and framing respond differently. A wall that relies only on a bead of caulk may look finished on bid day and still have no reliable path for water to escape.
The practical question is more than which window or siding color you prefer. It's whether the contractor can expose the right part of the wall, inspect what's underneath, and rebuild the opening in a sequence that keeps the drainage plane continuous. This is why siding, windows, and doors services in East Texas should be evaluated as an envelope project rather than a cosmetic package.
Four decisions control most of the outcome:
- Sequencing: Decide whether the windows, siding, or both should be handled first.
- Demolition depth: Determine how much cladding and trim must come off to inspect sheathing and framing.
- Flashing layers: Confirm that sill, jamb, and head flashing connect to the water-resistive barrier.
- Energy performance: Match glass, frame, and installation method to solar exposure, air leakage, and the existing wall.
Practical rule: A finished wall can hide poor workmanship. A properly documented open wall makes the workmanship verifiable.
A good siding window replacement project begins with craft, not a product catalog. The contractor should be able to explain where water goes at every transition, what happens if rot appears, and which party owns the repair if the window and siding scopes overlap.
Choosing the Right Sequencing for Your Project
There isn't one universal answer to the windows-first question. The right sequence depends on wall condition, window installation type, and evidence of moisture behind the siding.
Windows first
Window-first work can fit a home where the siding is relatively sound, the frames are failing, and the contractor can remove enough trim and cladding to integrate the new flashing. It may limit the amount of exterior disturbance, but only if the existing drainage plane remains accessible at the opening.
The risk appears when a crew installs a replacement window from the interior or works only within a narrow opening. They may be unable to connect the sill pan, jamb flashing, and head flashing to the surrounding housewrap. The new unit can be square and operational while the wall remains vulnerable at its perimeter.
Ask whether the window is an integral-flange unit or a block-frame replacement. A flange installation usually needs more exterior access because the flange and flashing become part of the wall's water-shedding assembly. A block-frame approach may preserve more siding, but it doesn't automatically solve hidden rot, failed flashing, or a deteriorated rough opening.
Siding first
Siding-first work makes sense when the cladding is badly deteriorated but the windows are newer, properly installed, and supported by sound framing. The crew can replace the water-resistive barrier, repair wall surfaces, and build clean trim transitions around the existing units.
The drawback is future access. If the windows are replaced later, the contractor may need to remove new trim or disturb the fresh drainage plane. The contract should state how the existing window perimeter will be protected and how future replacement would affect the new siding.
Both at once
A combined project is usually the most direct path when the wall condition is uncertain, the windows use integral flanges, or moisture evidence exists around several openings. Removing siding around the openings gives the crew a better chance to inspect sheathing, repair damage, and create one coordinated flashing system.
That doesn't make simultaneous work automatically superior. It enlarges the scope, exposes more concealed conditions, and requires a clear allowance or change-order process for repairs.
Before accepting a sequence, ask three questions:
- Can the contractor expose the sheathing at every affected opening?
- How is the existing water-resistive barrier tied into new flashing?
- Who repairs concealed rot, and how will the price be approved?
A recent siding installation on a dry, sound wall may support window-only work. An older wall with integral-flange windows, soft trim, staining, or recurring leaks usually deserves a more open inspection and a coordinated scope.
Demolition and Sheathing Inspection Done Right
The first day should look controlled, not destructive. A careful crew removes siding and trim around the opening in manageable areas, labels reusable pieces when appropriate, and protects adjacent finishes from unnecessary damage. The purpose isn't to strip the wall as quickly as possible. It's to reveal the conditions that determine how the replacement should be built.
What the crew should expose
Once the siding and trim are off, the project lead should inspect the sheathing, framing, sill, corners, and fasteners. Look for:
- Dark streaks: These can show historic water paths, especially beneath corners and window sills.
- Soft sheathing: Probe questionable plywood or oriented strand board rather than assuming discoloration means rot.
- Rusted nails: Corrosion can indicate repeated wetting or trapped moisture near the opening.
- Open joints: Gaps around the rough opening can allow conditioned air and wind-driven rain to bypass the intended layers.
- Damaged framing: Soft sill plates, studs, or rim areas need repair before the new window and siding cover them.
- Moisture readings: A single reading matters less than location, material, recent weather, and whether the area dries after exposure.
A wall may test damp after rain without having chronic damage. Conversely, a surface can feel dry while the sheathing has suffered long-term deterioration. The contractor should record where the reading was taken, identify the material tested, and explain whether the source is active or historic.
The pause point
A crew should stop before closing the wall when it finds a failed sill pan, caulk used as the primary flashing, softened sheathing, deteriorated framing, or a wet cavity with no identified source. Take photographs that show the opening, the defect, and a wider reference point so the repair can be understood later.
A change order becomes reasonable in this situation. The contractor should describe the repair, explain why it's required, provide the added cost, and receive approval before covering the work. Homeowners can compare the crew's process with this practical building envelope inspection advice when preparing questions for the site meeting.
If the source of moisture hasn't been corrected, replacing the visible material only resets the clock on the same failure.
Don't let a crew install new siding over damaged sheathing because the problem is inconvenient. The wall needs a dry, stable substrate, repaired framing where necessary, and a documented transition from the existing assembly to the new one. Photographs taken before insulation, trim, or cladding goes back on are part of the quality record, not an optional courtesy.
Flashing and Waterproofing That Keeps Water Out
A window and siding replacement succeeds only when the wall's drainage layers work as one system. Flashing should overlap so each upper layer sheds water onto the one below, while the lowest layer sends it to the exterior. A reversed lap, a joint that ends at a corner, or siding that blocks the outlet can redirect water into the wall.
Build from the drainage plane outward
Start with the water-resistive barrier, whether it is housewrap, building paper, or exterior insulation designed for that role. Keep it continuous around the opening and connect it to the flashing instead of ending it at the window frame.
Install the sill pan or sill flashing first at the rough opening. End dams or properly formed corners keep water moving outward rather than into the wall. Set the window plumb, level, and square, then shim and fasten it according to the manufacturer's requirements.
Run jamb flashing along both sides. Install head flashing across the top, then lap the surrounding WRB over it in shingle fashion. The Building Science Corporation guide describes head and sill flashing that projects at least 2 inches beyond the jambs, helping prevent water from concentrating at the corners.
Check the water path
Stand back and trace the route a drop of water would take. It should move from the wall above the window onto the head flashing, over the jambs and sill pan, and out through an unobstructed opening at the bottom. If that route is broken, more sealant is not the fix. The water path is.
Check for reverse-lapped housewrap, which sends water behind the lower layer. Also inspect rigid flashing joints, corner transitions, and the clearance between siding and horizontal flashing. Unsealed joints or tight siding can trap water or turn it inward.
Roof-to-wall intersections deserve close inspection. Kick-out flashing should send roof runoff away from the wall and into the gutter, rather than concentrating it beside the window or trim. East Texas walls exposed to driving rain need this detail checked before cladding covers it. A homeowner can view the visible portion from the ground with a flashlight, but concealed laps require photographs before siding returns.
Pressure washing can expose weak transitions or force water behind panels. Before cleaning the finished wall, review how to avoid siding damage when washing. Water testing should follow the assembly's design and never involve spraying directly into an unprotected opening.
For a field reference on rebuilding the exterior layer, review these siding replacement methods. Caulk seals selected joints, but layered flashing manages water.
Trim Integration and Reinstalling the Siding
Once the opening is dry, repaired, and flashed, the visible work begins. A sound wall can still be compromised by rushed trim cuts, blocked drainage, or fasteners driven without regard to the siding manufacturer's instructions.
Let trim overlap the drainage logic
Trim should direct water over the cladding, not behind it. At a window, the head trim or drip cap needs to work with the head flashing. Side trim should maintain the designed clearance and cover the transition without pinching siding. J-channel around vinyl siding must receive panels without trapping water at the bottom.
A mounting block belongs beneath fixtures such as lights, hose bibs, and exterior outlets. Cutting siding around a fixture and filling every gap with sealant may look neat, but it doesn't provide the same support or drainage control as a properly integrated block.
At roof-to-wall locations, kick-out flashing protects the edge where runoff can otherwise soak the siding and trim. On East Texas elevations exposed to driving rain, that small piece of metal can matter more than an extra bead of caulk.
Preserve movement and drainage
For wood or fiber-cement siding, a ventilated drainage gap of approximately 1/4 to 3/8 inch can provide effective airflow when the rest of the detailing is continuous, according to Department of Energy guidance for siding and moisture control. The gap isn't a license to leave random voids. It must connect to open drainage paths and remain free of debris.
Use corrosion-resistant galvanized fasteners and follow the product's specified penetration, spacing, and placement. A nail driven too tightly can restrict movement or distort the panel. A fastener set too shallow can leave the surface vulnerable to impact and moisture.
Wood siding deserves additional preparation. Back-prime faces, edges, and end grain before installation, especially at field cuts. End grain absorbs moisture readily, and coating it before the board reaches the wall is easier than trying to repair a failure after the trim is installed.
Don't caulk the bottom edge of siding tight against horizontal flashing. That closes the escape path the wall needs. Seal only the joints that the siding and trim system calls for, leave intended drainage openings open, and inspect corners before final paint or touch-up.
Energy Efficiency and Window Performance Choices
A window replacement on a siding wall should improve comfort without creating a new weak point in the enclosure. Windows account for approximately 30% of energy use in residential buildings, according to a Minnesota government energy-retrofit program. That figure supports an evaluation, not an automatic replacement order. Check the glass, frame, air leakage, shading, and surrounding wall together.
ENERGY STAR guidance reports that ENERGY STAR-certified windows reduce household energy bills by an average of 12%. The same guidance states that certified low-emissivity storm windows can reduce annual heating and cooling bills by about 20% in older homes with single-pane clear glass and no existing storm windows. These are averages, not a Tyler guarantee. Results depend on climate, window area, orientation, leakage, HVAC efficiency, occupant behavior, and installation quality.
East Texas homeowners usually notice summer heat first. Solar heat gain coefficient, or SHGC, indicates how much solar heat passes through the glass. A lower SHGC suits strongly sun-exposed windows, although orientation and exterior shade still affect comfort. U-factor describes heat flow through the window, while air-leakage performance matters when drafts cause discomfort.
Compare the upgrade paths
Frame selection affects both maintenance and installation. Vinyl suits homeowners who want the lowest maintenance, wood suits period-appropriate assemblies, and composite balances appearance with resistance to maintenance demands. The deciding factor is whether the frame fits the rough opening and flashing plan. The same material logic applies when comparing durable composite doors from Home Glass Solutions with window systems, because door material and window-glass performance solve different problems.
Before requesting bids, review this guide on how to choose replacement windows for your home. Bring the performance targets to the contractor, then verify that the selected window, siding access, and flashing sequence work as one wall system.
Common Pitfalls and a Pre-Bid Checklist
The most expensive siding window replacement may be the one started before the wall has been diagnosed. A 2024 life-cycle study found that maintaining existing windows generally minimized climate impact and cost except under specific conditions, including poorly insulated buildings, high-carbon heating, or colder climates, as summarized in the supplied ENERGY STAR material. Repair, air-sealing, shading, or storm windows may be a better first step when the frame is sound.
Watch for reverse-lapped wrap, missing sill pans, siding tight against horizontal flashing, concealed rot covered without repair, and contracts that leave the window-siding interface assigned to nobody.
Take this checklist to the bid meeting:
- Open-wall inspection: Ask what siding and trim will be removed at each opening.
- Flashing sequence: Require sill pan, jamb flashing, head flashing, and WRB integration in writing.
- Moisture process: Ask how readings, photographs, and active leak sources will be documented.
- Change orders: Define who approves concealed sheathing and framing repairs.
- Responsibility: Identify the party responsible for failures at the window-to-siding transition.
- Verification: Request photos showing shingle-style laps, open drainage, and flashing before closure.
National remodeling benchmarks show why buyers value these projects, but they aren't guarantees. A 2025 summary reported fiber-cement siding replacement at approximately 113.7% cost recovery, while separate analysis listed recovery of 92.7% for fiber-cement siding, 91.0% for vinyl siding, and 90.1% for vinyl window replacement, based on the remodeling cost data summary. Local labor, materials, storm exposure, installation quality, and buyer expectations can change the result.
Home Pro's Remodeling & Repairs handles exterior remodeling in Tyler and across East Texas, including coordinated siding and window replacement with onsite consultations and documented project planning. Visit Home Pro's Remodeling & Repairs to request an estimate and discuss the wall condition, sequencing, flashing scope, and repair options before work begins.
Home Pro's Remodeling & Repairs, (903) 920-2969
Call (903) 920-2969More articles
7 Best Outdoor Kitchens: Designs, Costs, and Build Tips
Many outdoor kitchen problems begin on day one, when the layout, cover, and utility routes get decided before anyone looks closely at the budget.
Bathroom Vent Through Wall: Complete DIY Installation Guide
You've just stepped out of the shower on a humid East Texas morning.